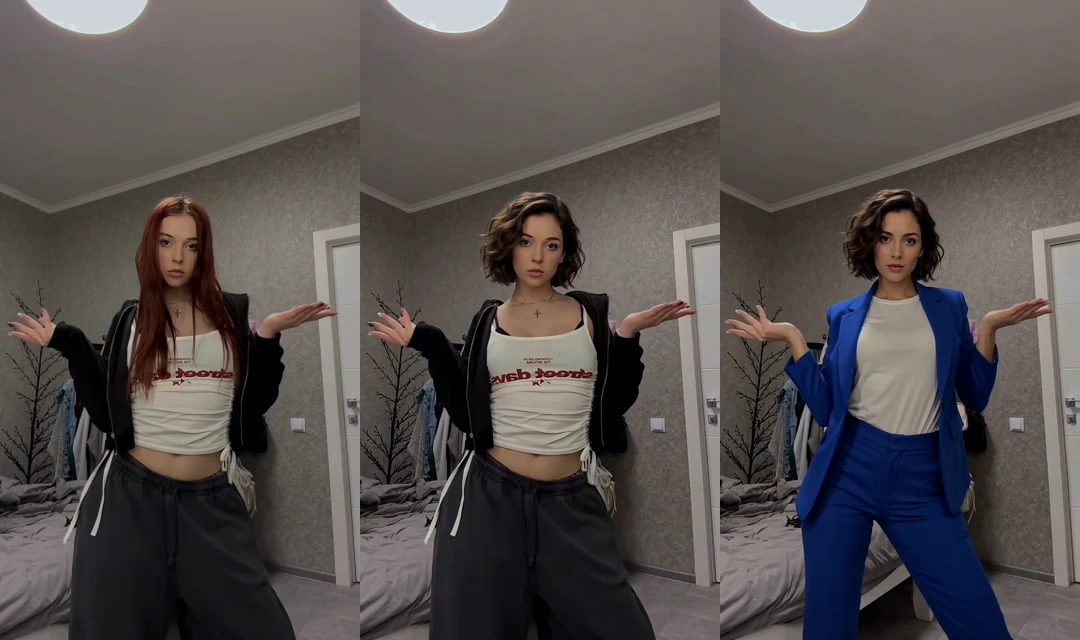
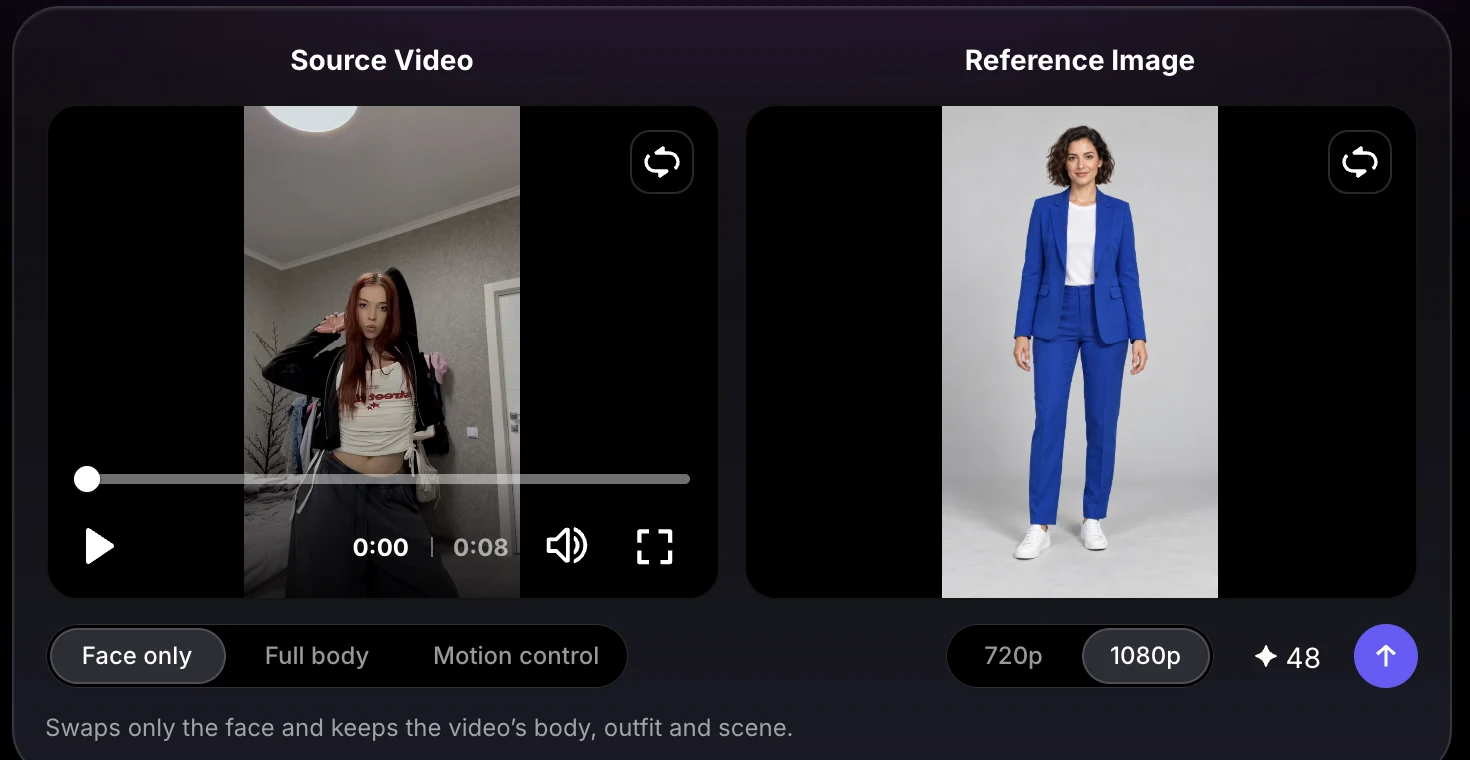
Use Face only when you want a new face with the source outfit and performance. Choose Full body when you also want the reference person’s hairstyle and clothing. This tutorial compares both modes using the same 8-second source clip and the same reference image.
Before You Begin
- Use media you own or are authorized to edit, and get consent to use someone’s likeness.
- Start with one clear main subject and avoid heavy blur or objects covering the face.
- Choose a clear reference image and check the credit estimate before each generation.
Add Your Source Video
Open Face Swap and choose the Video tab. Upload your own clip, select a video from Assets, or hover over a Trending Template to preview it.
For an easy first test, choose a short clip with one clearly visible main subject. The current workflow accepts videos from 4 to 180 seconds, up to 200 MB. MP4 is recommended.


Choose a Reference Image
Use Upload, Assets, or Avatar Library to choose the person you want to bring into the video. Avatar Library includes your own avatars and sample characters.
For Face only, use a sharp photo with an unobstructed face; you do not need to crop it into a close-up. For Full body, show the complete person and outfit, preferably with empty hands. Avoid complex obstructions.
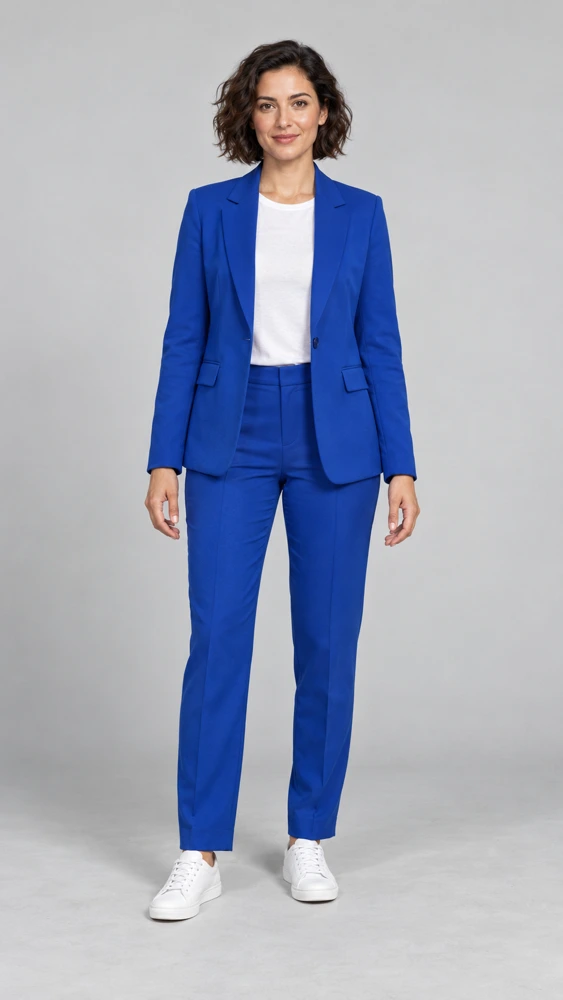

No headshot crop required.

Prefer empty hands.
The reference background is not used.
Choose Face only or Full body
Choose the mode based on how much of the person you want to change. Both modes use the source performance and scene; the reference image supplies the new identity or look.
| What comes from each input? | Face only | Full body |
|---|---|---|
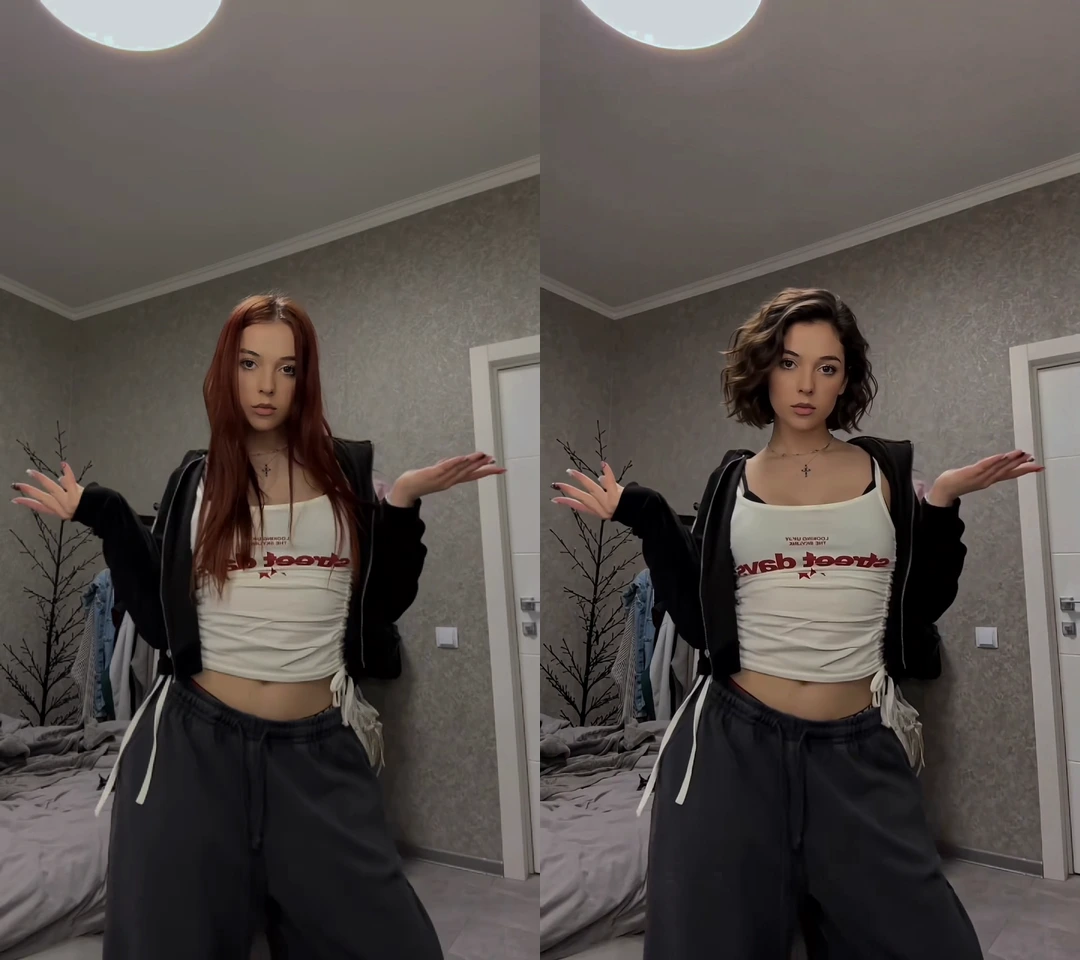
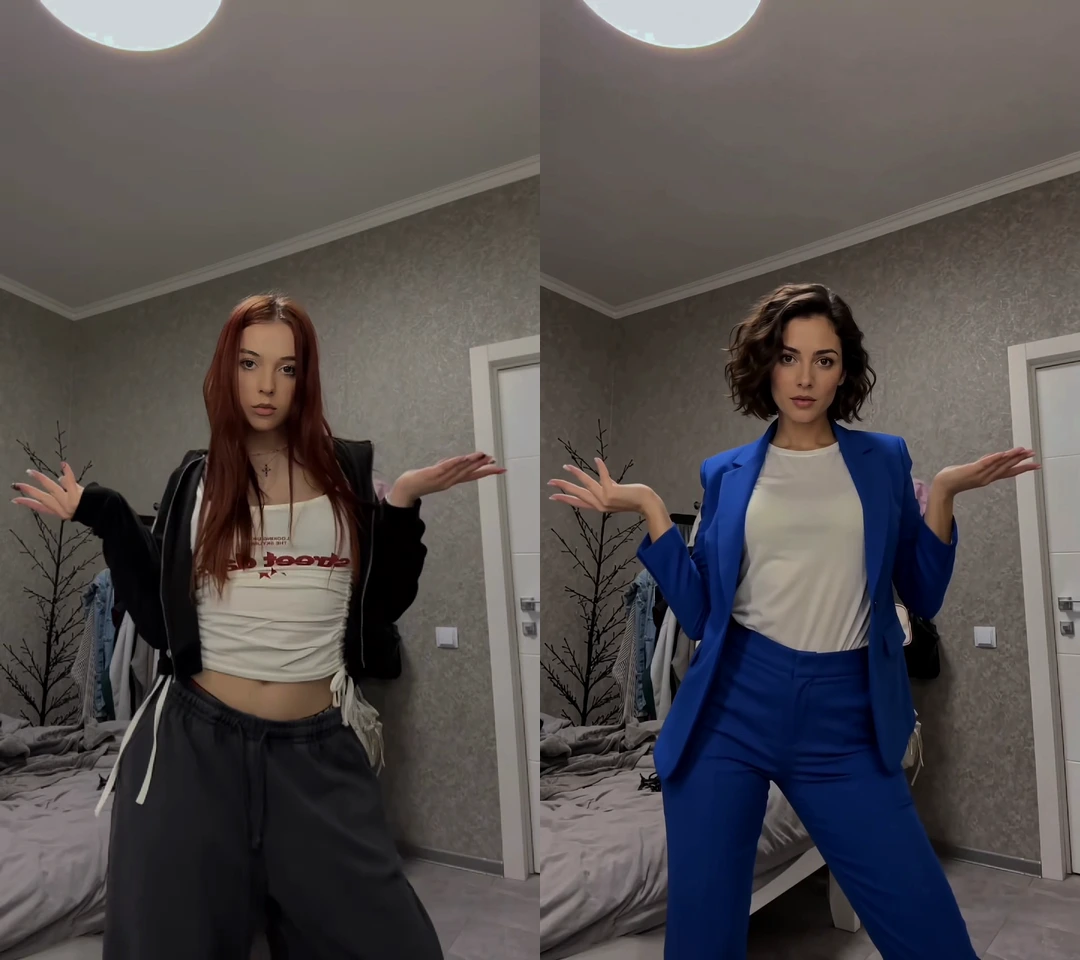
| Reference image | Replacement face | Face, hairstyle, and clothing |
| Source video | Body, outfit, actions, expressions, and scene | Actions, expressions, and scene |
| Background | Source video scene | Source video scene |
| Audio | Original source audio | Original source audio |
The reference image’s background does not replace the video background. These are generated results, so inspect the details rather than expecting a pixel-for-pixel match. Even in Face only, hair and other details can change.
Face only: change the face
Full body: bring in a new look
Set the Resolution and Check the Cost
Select 720p or 1080p. At the time of this tutorial, 720p costs 4 credits per second and 1080p costs 6 credits per second. Face only and Full body have the same rates.
Check the estimate beside the generate arrow before submitting. This example uses an 8-second clip at 1080p: 8 × 6 = 48 credits for one generation. Generating both modes is optional and creates two separately charged results.
Generate Your Video
Click the generate arrow. Your task appears in Videos below the form. When it is ready, open the video card.
To compare modes, you can optionally keep the same source and reference image and generate a second version with the other mode. You only need one generation to use your chosen mode.
Compare and Download the Result
Play the result and compare it with the source. Check the face, clothing, movement, and scene throughout the clip, then download the version you want to use.
Both modes keep the original audio. Changing the person’s appearance does not clone or replace the speaker’s voice.
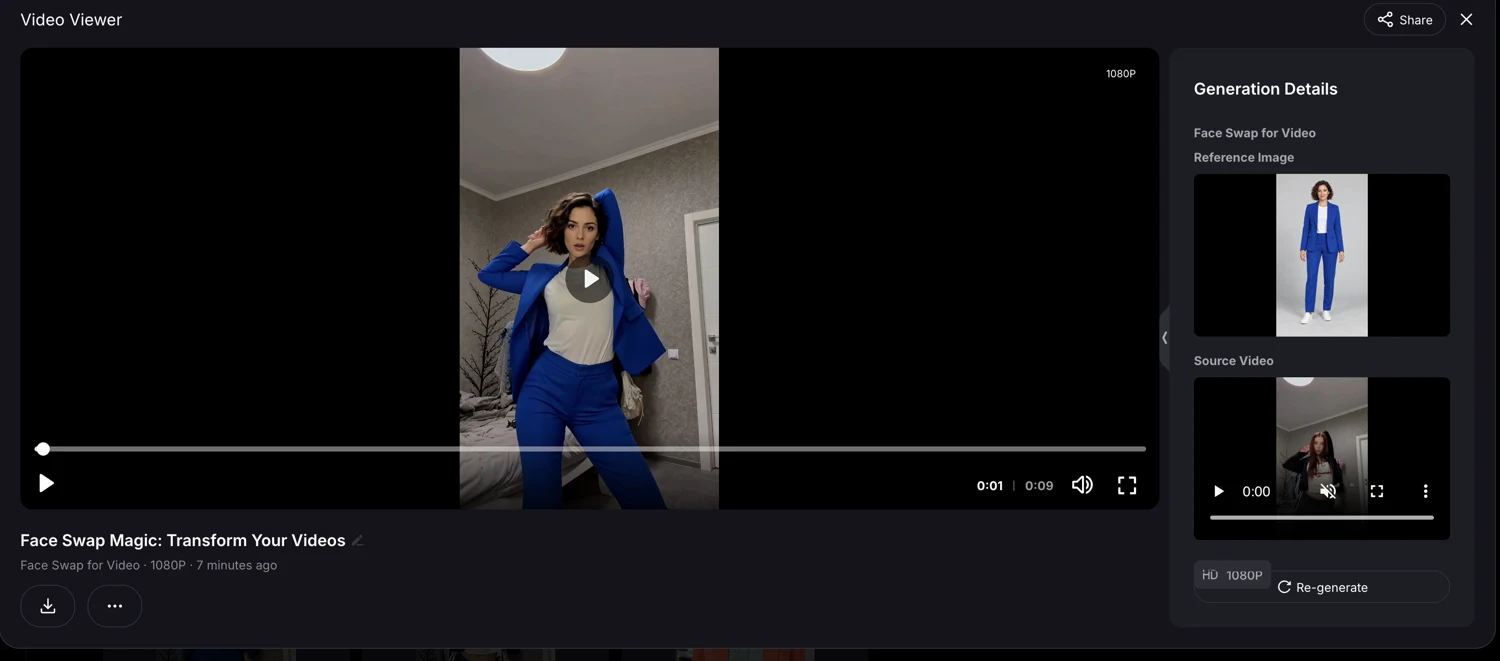
Use the download icon below the video title.
Adjust and Try Again
Use Re-generate to bring the original inputs and settings back into the form. Change what you need, review the new estimate, and submit another generation. This is a new paid generation, not a free retry.
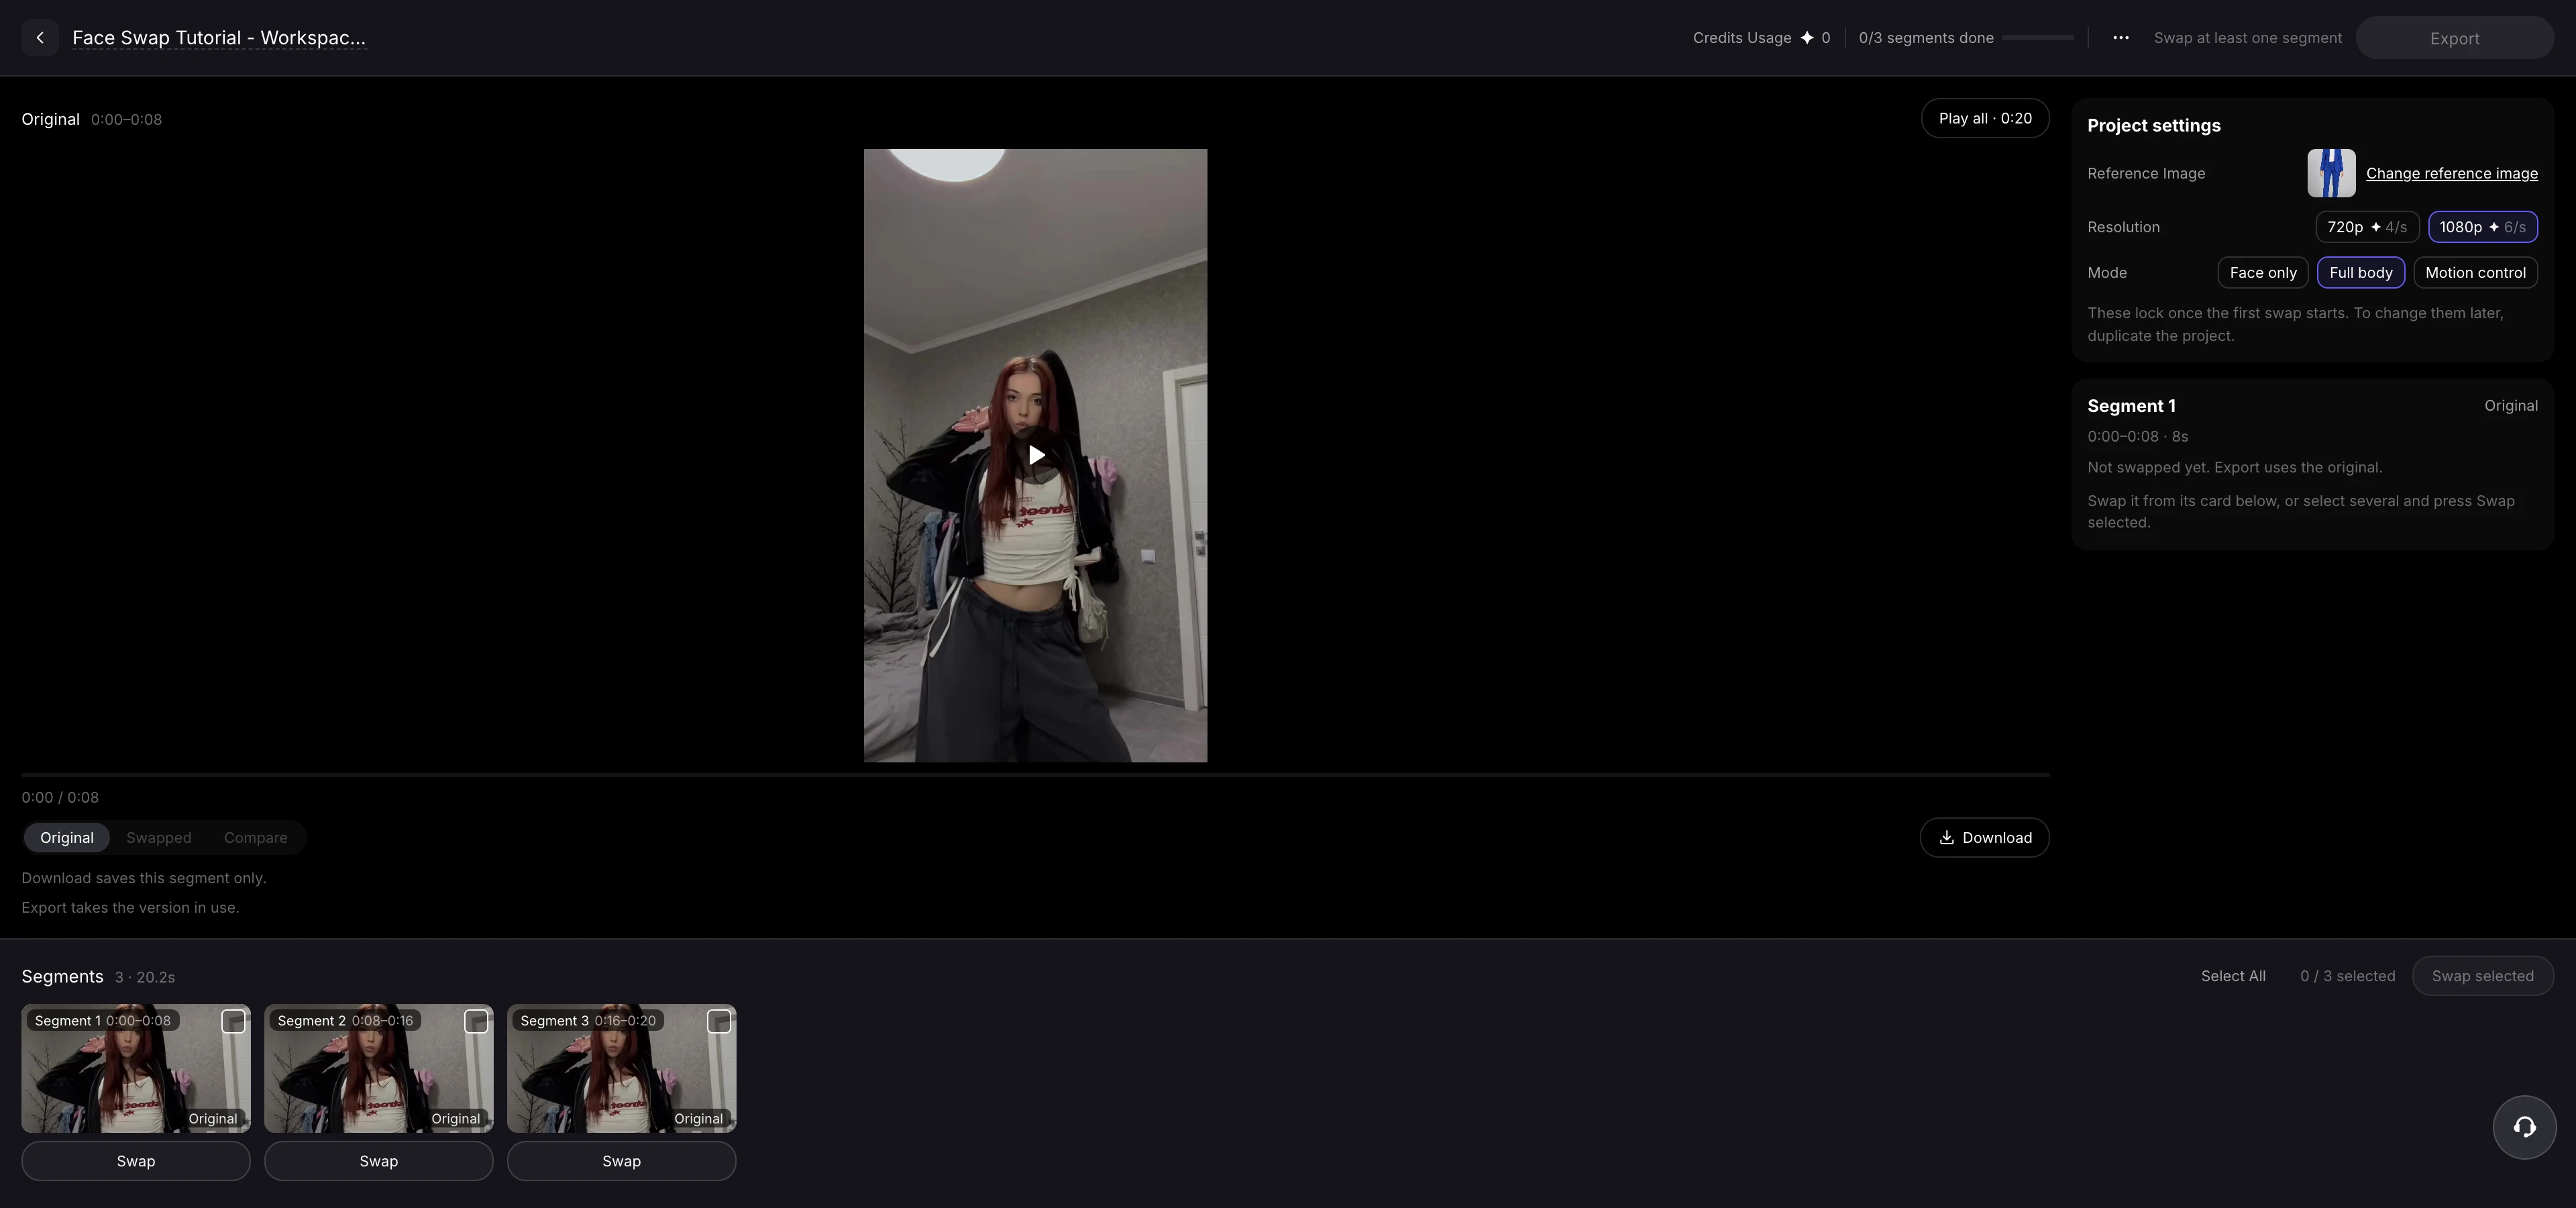
For longer videos, follow the Workspace tutorial to refine individual segments, compare versions, and export the complete video.
Ready to Try It?
Choose a source clip and a reference image, then try Face only or Full body in VisionStory using the Try Face Swap button above.
Working with a still image? Follow our separate photo face swap tutorial.
Want the photo’s background instead? Follow the Motion Control tutorial.