Ready to turn a script into a lifelike AI presenter? This step-by-step guide shows you how to create your first AI talking avatar video in VisionStory—choose an avatar, add your words, pick a voice, and generate a polished talking video in minutes. Watch the walkthrough above, then follow along below.
Step 1: Choose or Create Your Avatar
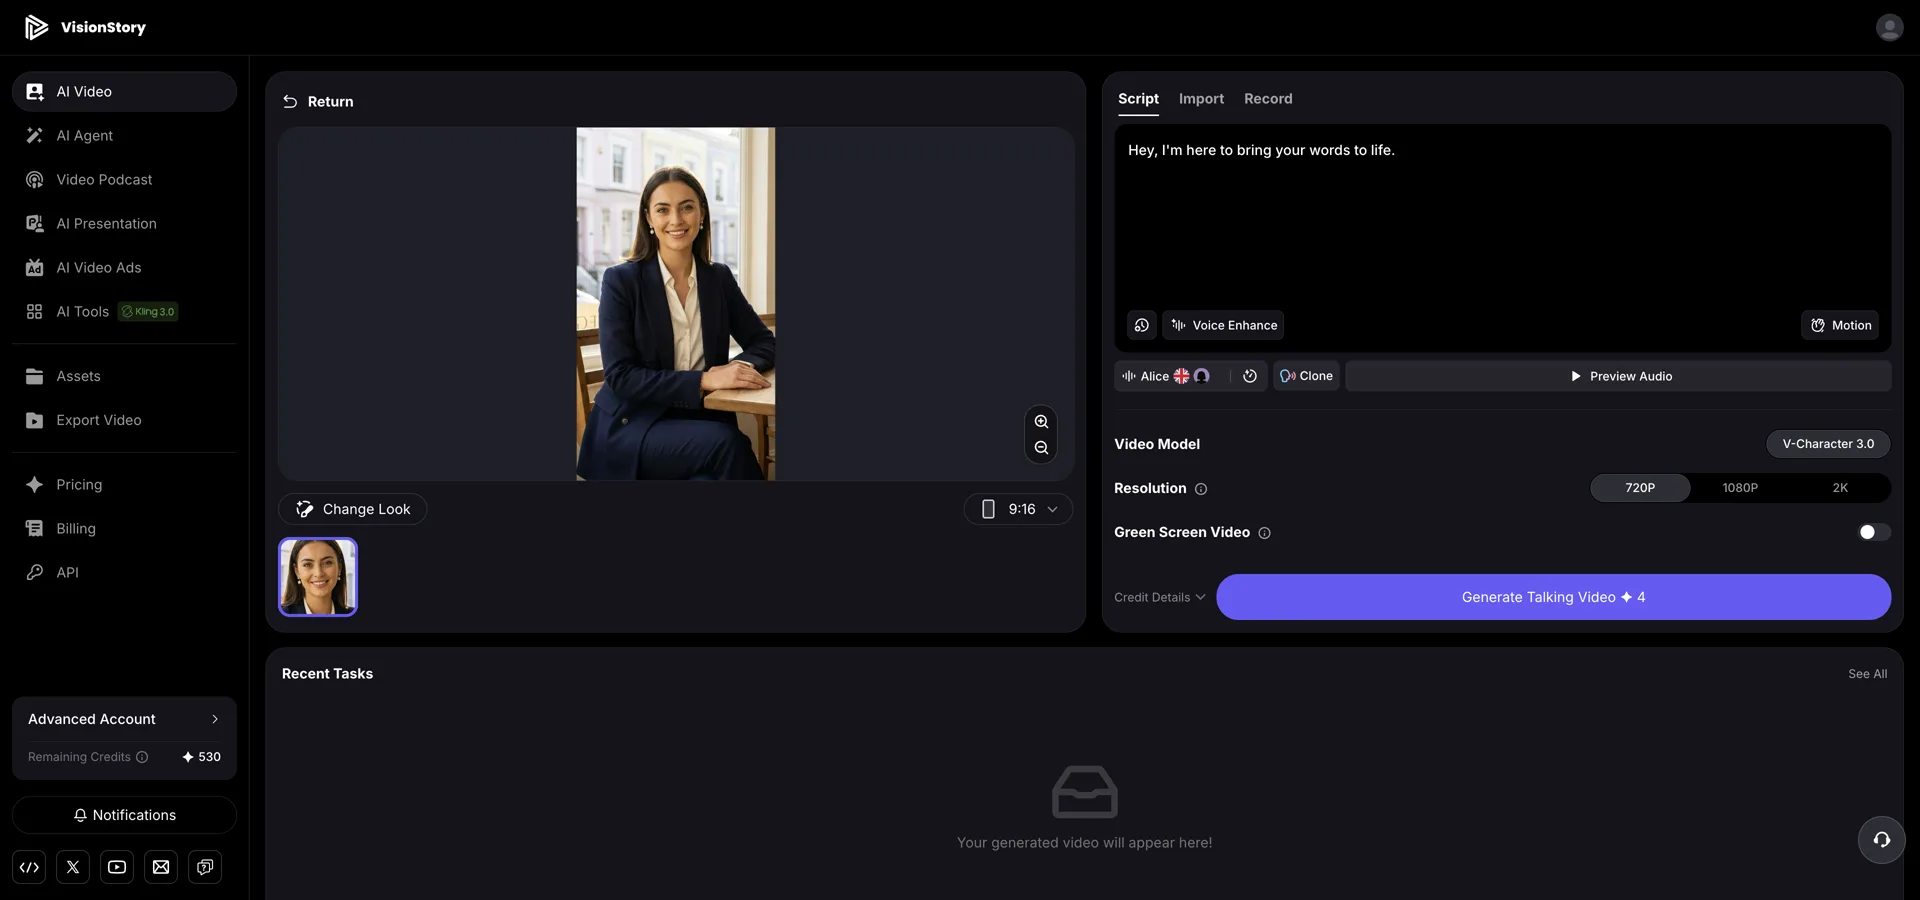
Open AI Video and decide who will present. You have three ways to get an avatar:
- Choose a built-in avatar: Select one of VisionStory’s ready-made public characters—the fastest way to start.
- Upload your own photo: Add a clear, front-facing image to turn a real person into a talking avatar.
- Generate an avatar: Create a brand-new character from a text prompt.
Use Change Look at any time to adjust the selected avatar.

Step 2: Add Your Script
Tell your avatar what to say. In the panel on the right, choose how to provide the audio:
- Script: Type the words you want your avatar to speak and let AI generate the speech.
- Import: Upload a pre-recorded audio file to drive the video — the avatar’s AI lip sync follows your recording.
- Record: Record your voice directly inside VisionStory.
Keep your first script short so you can review the result quickly.
Step 3: Pick a Voice
Every avatar comes with a default voice, but you can change it:
- Voice Library: Open the library to explore 1,000+ voices across 88 languages, and use search to quickly find the exact voice you want.
- Clone a voice: Create a custom AI voice from a short sample of your own recording.
- Preview & enhance: Use Preview Audio to listen before you commit, and Voice Enhance to clean up the sound.

Step 4: Choose Your Video Model, Resolution & Options
Before generating, set up how the video looks:
- Video Model: VisionStory uses its latest talking-avatar model, V-Character 4.0, for natural lip-sync and expression.
- Resolution: Choose 720P, 1080P, or 2K depending on where you’ll publish.
- Aspect ratio: Switch between 9:16 (portrait), 16:9 (landscape), and 1:1 (square) to match your platform.
- Green Screen Video: Turn this on only when you need a solid background to replace later in editing.
- Motion: Adjust how much the avatar moves for a more dynamic delivery.
Step 5: Check Credits and Generate
VisionStory shows the cost before you generate:
- Credit Details: Expand Credit Details to see how the total is calculated—cost depends on the resolution and length you chose (for example, a 60-second 720P video costs 15 credits).
- Generate Talking Video: When everything looks good, click Generate. VisionStory animates your avatar, syncing lips and expressions to your script.
Step 6: Review, Share, and Manage Your Video
Once processing finishes, your video appears in Assets, where you can:
- Preview the final result and rename it for easy organization.
- Download the MP4, or copy a share link to post anywhere.
- Share directly to social platforms like X or Facebook.
- Delete a video you no longer need.
That’s it—you’ve created your first AI talking avatar video. From here you can try different avatars, clone your own voice, or export in higher resolution as your projects grow.