AI face swap replaces the face in a photo without reshooting the photo. That is useful for switching the licensed model in an approved brand visual, testing different people in the same composition, or putting your own character into new outfits and scenes — the framing, hair, clothing, pose, and background all stay put.
This walkthrough swaps a fictional woman's authorized reference face into an office scene featuring a fictional man. Both images were generated for this tutorial and correspond to no real person. Use only faces and photos you own or are explicitly authorized to use, and never use a swap to impersonate, mislead, or violate someone's privacy.
Step 1: Open Face Swap and choose Image mode
Open VisionStory's Face Swap tool and switch to Image at the top. The page first asks for the photo whose face will be replaced, in JPG, JPEG, PNG, WEBP, or HEIC.
The face in that photo should be clearly visible — avoid hard profile angles, heavy occlusion, motion blur, and dim light. The original photo's quality decides whether the final result keeps natural feature edges and lighting.

Step 2: Upload the photo to modify
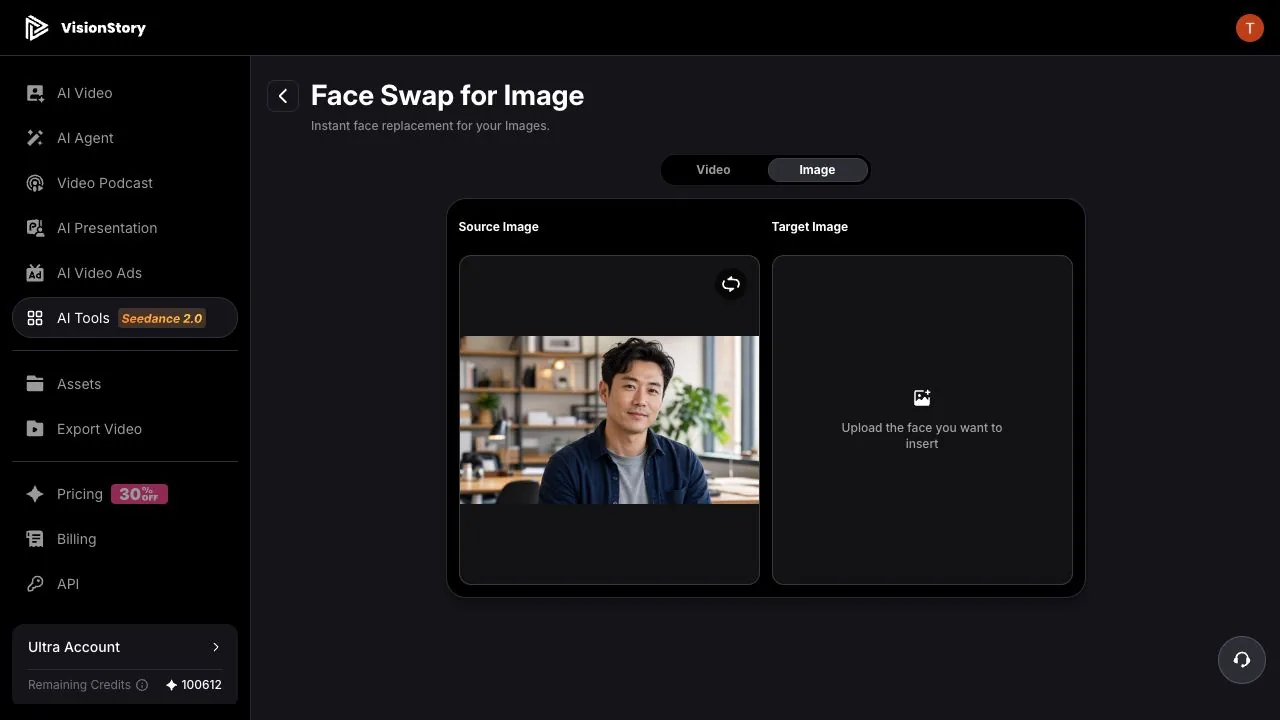
Click the upload area and choose the full photo to face swap. It appears on the left as the Source Image, while the right-hand Target Image waits for the new face.
The example source is a landscape office portrait. A face swap changes facial identity only — composition, hairstyle, clothing, body pose, and background all come from this source photo. If any of those are wrong, change the source photo; do not expect the swap to redesign the picture.
Step 3: Upload the new face reference
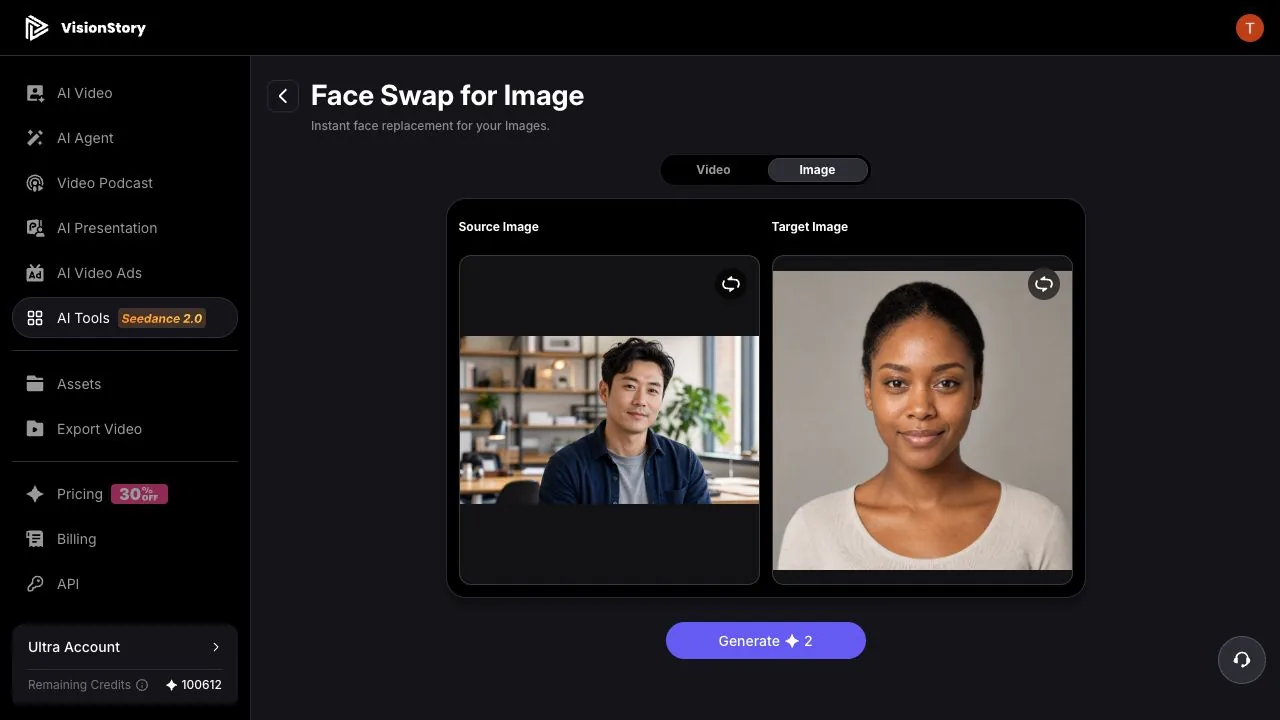
Click Target Image on the right, choose Upload in the Add Character dialog, and add an authorized photo of the new face. The best references are frontal or lightly angled, with complete features, no glasses or hair across the face, and lighting close to the source photo's direction.
With both slots filled, double-check the order: left is the photo being modified, right is the face being inserted. If either is wrong, use the replace button in the image's corner to re-upload.
Step 4: Generate, inspect, and download
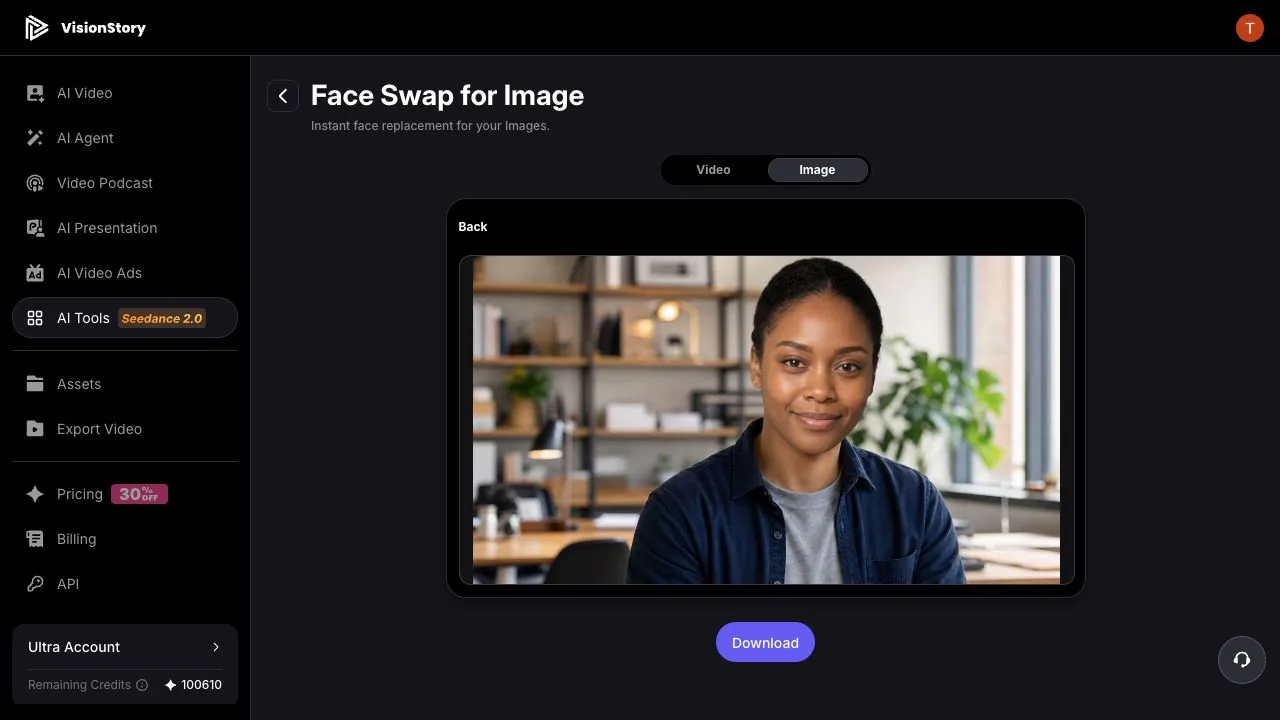
Click Generate. The result appears as a new photo ready to preview and download. In this example the short hair, navy jacket, gray top, pose, and office background all survive; only the facial identity changes to the reference person.
Before downloading, zoom into the eyes, brows, nostrils, mouth corners, teeth, hairline, and cheek edges, and compare the face's skin tone against the neck, hands, and ambient light. If the edges look wrong, switch to a reference face with a closer angle, sharpness, and lighting — resubmitting the same mismatched pair rarely improves anything.
Common problems and how to fix them
- The result does not resemble the reference person. Use a sharper, more complete frontal reference; avoid heavy beauty filters, low resolution, and occlusions. A face that is tiny in the reference frame carries too little identity signal.
- Skin tone or lighting clashes with the photo. Choose a reference whose light direction, color temperature, and angle sit closer to the source photo. The swap adapts, but it cannot cancel a large lighting gap.
- Hairline, glasses, or hair edges glitch. Switch to a reference without fringe, thick glasses, hands, or bold accessories near the face, and make sure the source face's edges are unobstructed too.
- The result kept the original hairstyle and clothes. That is by design. Face Swap replaces facial identity only; hair, clothing, pose, and background belong to the source photo and must be settled there.
A natural photo face swap is not two faces pasted together. It comes from a clean source photo, a reference face matched in angle and lighting, and a detail inspection after generation — plus explicit authorization for every face involved. When the person needs to move and speak, continue with face swapping a video.