Video face swap is for when the performance already works — the motion, the delivery, the camera — but the on-screen person needs to change, with authorization. Typical jobs: producing alternate licensed-model versions of one ad take, letting your own virtual character reuse a performance, or adjusting a character's identity without reshooting the action or the scene.
This walkthrough uses a 6-second, 16:9 spokesperson clip of a fictional presenter as the source, and inserts another fictional person's reference face. Every face involved was generated for this tutorial and maps to no real person. Do not upload unauthorized footage or faces, and never use a video swap to impersonate anyone, mislead viewers, or defeat identity checks.
Step 1: Open Face Swap and choose Video mode
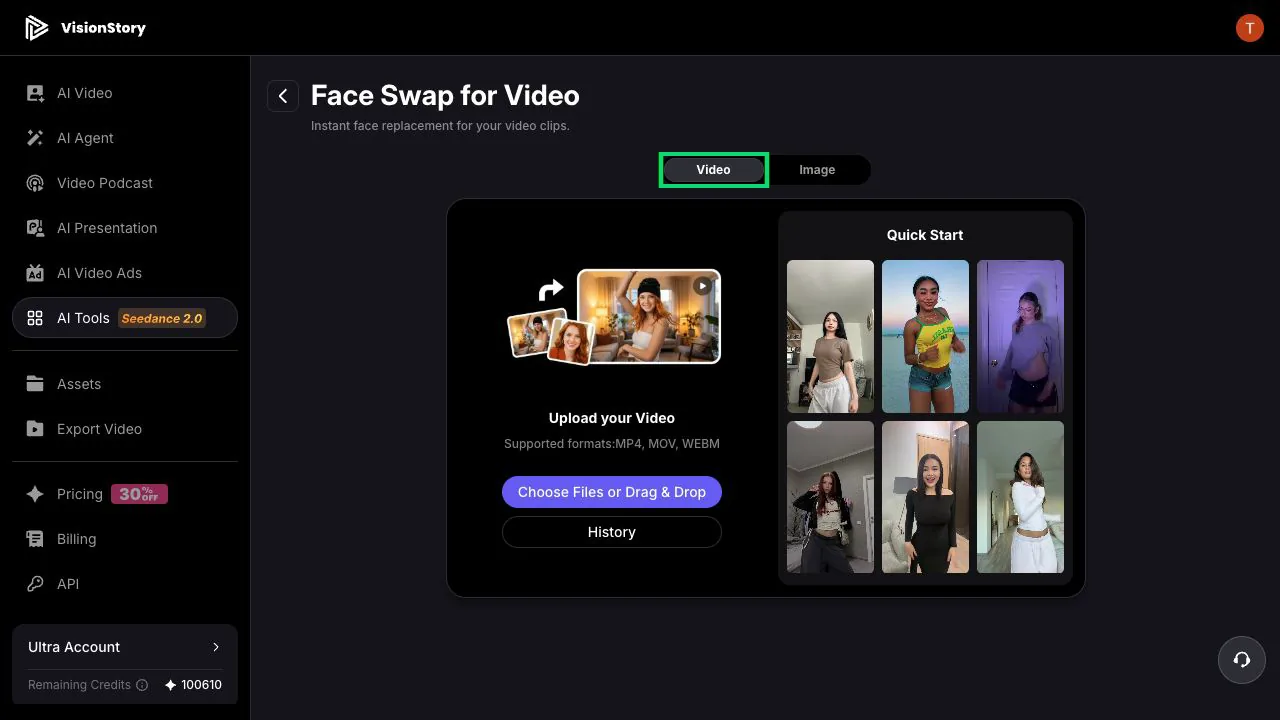
In VisionStory's Face Swap tool, select Video at the top. The page accepts MP4, MOV, and WEBM uploads, and the Quick Start samples show the expected input shape.
For real production, upload footage you have the rights to use. Prefer a single subject with a reasonably large, sharp face and steady lighting — multiple people, frequent face occlusion, and violent motion all make continuous tracking harder.
Step 2: Upload the source video and watch it end to end
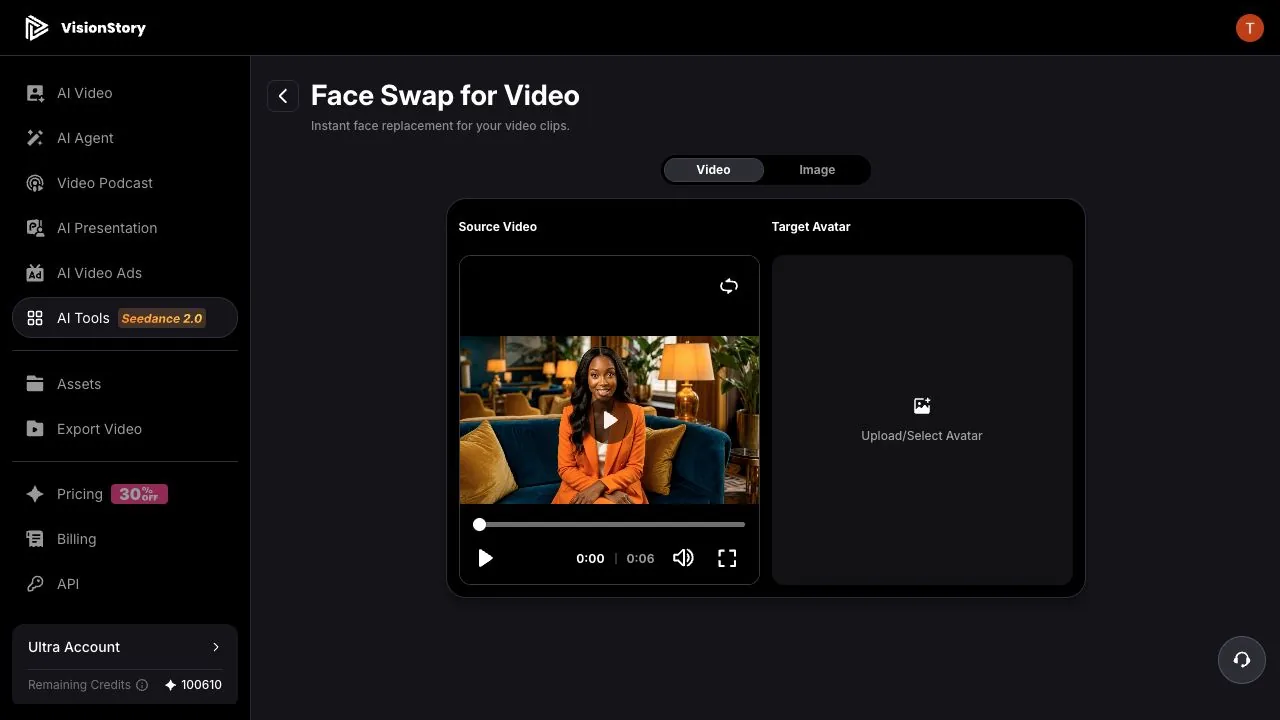
Click Choose Files or Drag & Drop and upload the source clip. It loads on the left as the Source Video with a scrubber and audio controls. The example is a 6-second landscape take in which the presenter talks, blinks, and turns slightly.
Do not judge by the first frame. Play the whole clip and confirm there is one main subject, the face never leaves the frame for long, and nothing — hands, hair, a microphone, fast motion — hides it for stretches. The swap keeps the source video's motion, outfit, background, and audio, everything except the face, so those elements must already be right before you spend credits.
Step 3: Upload the target face and confirm the credit cost
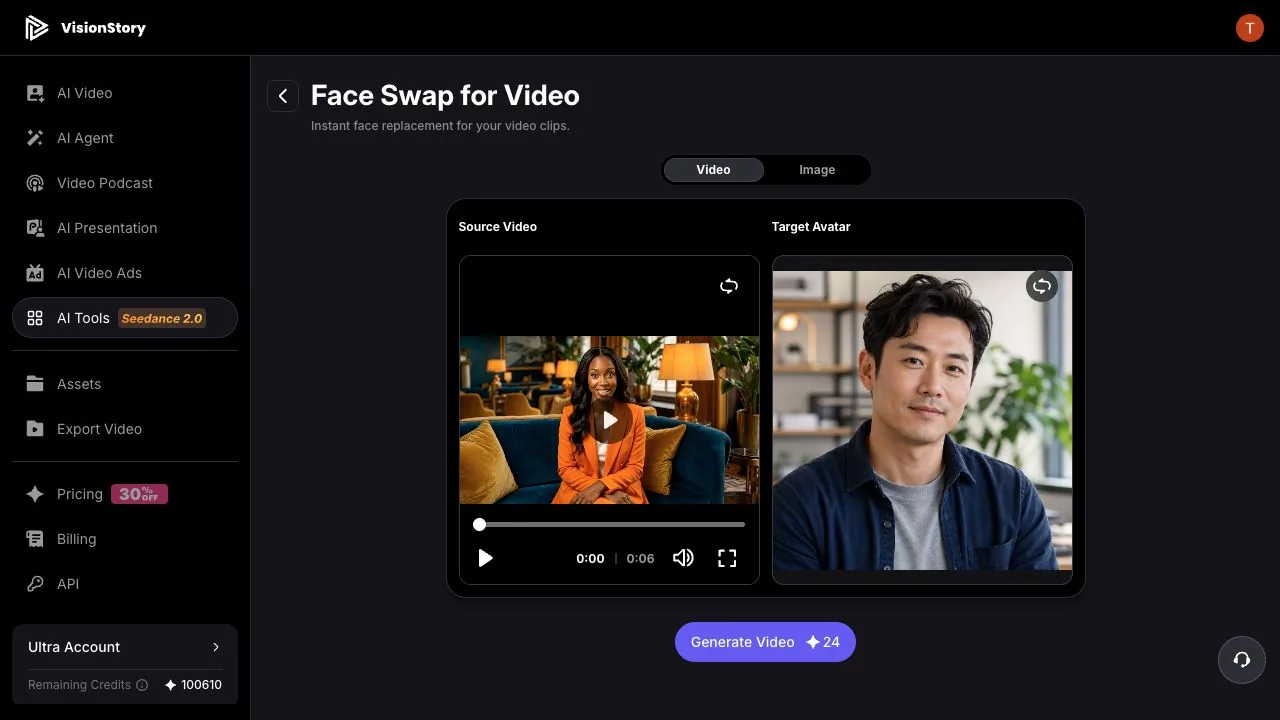
Click Upload/Select Avatar on the right and add the authorized target face via the Add Character dialog. Use a sharp, unobstructed reference whose angle sits close to the video's dominant view — no thick glasses, no hands across the face.
Back on the page, the left shows the source video and the right shows the target face. The generate button prices the current job in credits; this 6-second example showed 24 credits at submission. Treat the on-page number as authoritative — it moves with video length and product rules.
Step 4: Generate and find the result in History
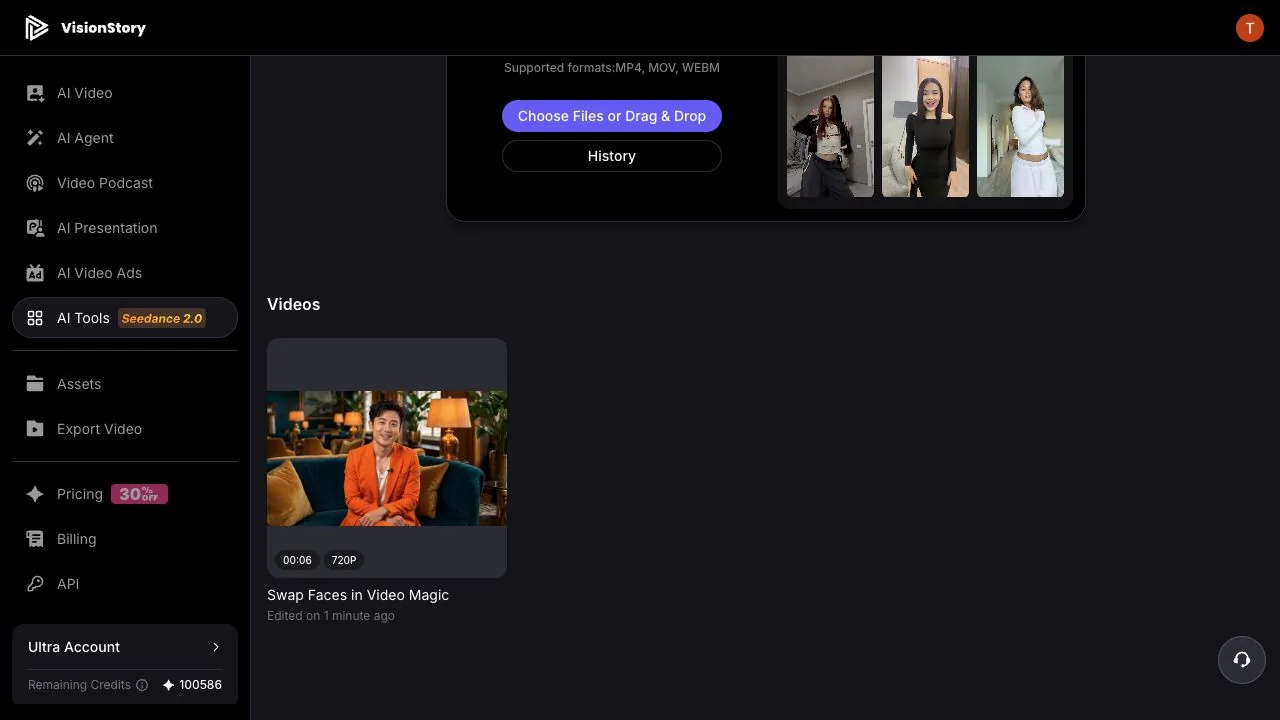
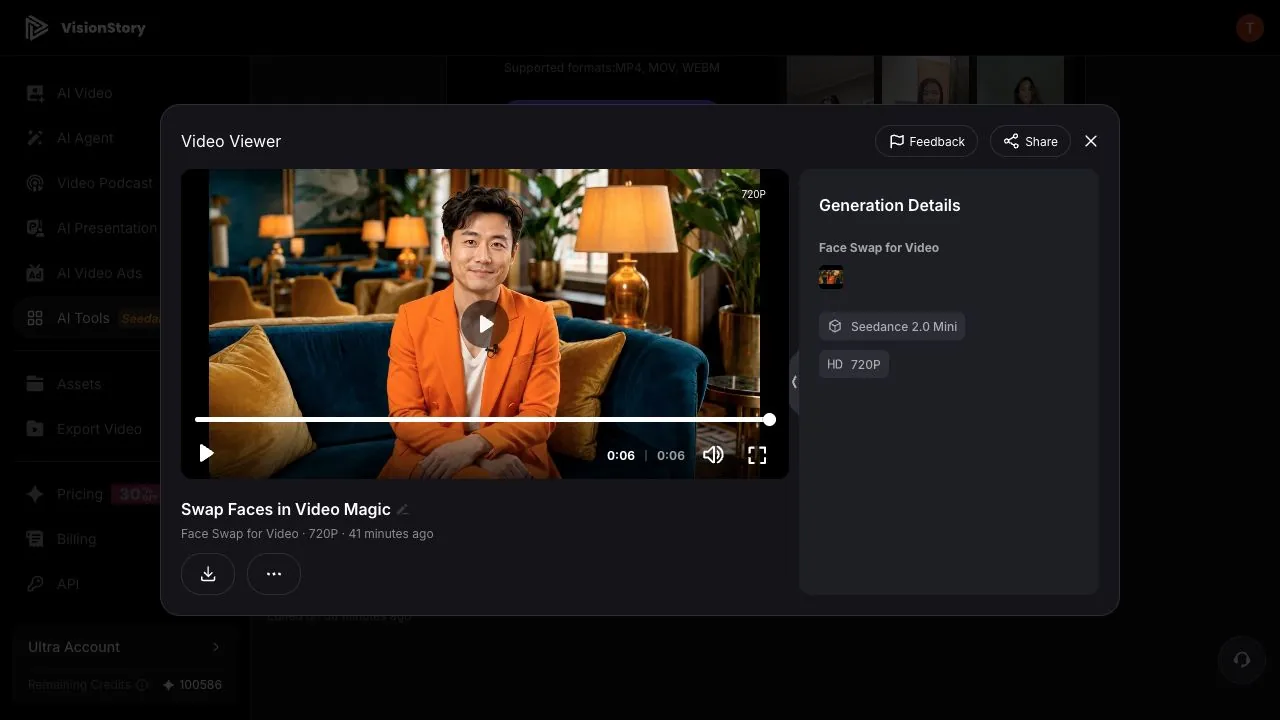
Click Generate Video. The job appears in the Videos history below — Generating while it runs, then duration, resolution, and title when it completes. The example returns 00:06 at 720p, matching the submitted clip.
Do not resubmit the same job mid-generation. Wait for the card to become playable, then open it in the Video Viewer.
Step 5: Check the face tracking segment by segment, then download
Play the result from the top and scrub the opening, middle, and ending. Watch the mouth corners during speech, the blinks, the brows, the hairline, and the jawline — and whether the identity holds when the head turns.
The example pauses near the end on a natural, eyes-open frame: the target face still follows the source's expression and angle, while the orange suit, body motion, sofa background, audio, and duration are untouched. Only after confirming there is no flashback to the original face, no edge drift, and no skin-tone jump should you hit download.
Common problems and how to fix them
- The original face flashes back mid-video. Check that timestamp for fast turns, the face leaving frame, motion blur, or long occlusion. Trimming to a stretch where the face stays visible beats regenerating a difficult clip repeatedly.
- Mouth, eyes, or hairline drift during motion. Use a sharper, more complete reference face angled like the video's dominant view, and make sure the source face has enough pixels — not over-compressed or noisy.
- The identity is fine but clashes with the body or wardrobe. The swap never touches body, hair, clothing, or scene. Pick a target face that harmonizes with the source character's age, skin tone, and look — or change the source video.
- The audio did not change. Expected. A video face swap replaces the face only; the voice still belongs to the source video. Change it separately with an authorized AI voice-changing workflow.
A reliable video face swap needs three things at once: a source face that stays sharp and visible, an authorized reference matched in angle, and a full-timeline review. A photo swap is judged on one frame — a video swap must survive every blink, word, and head turn, so never let a single preview frame stand in for the finished clip. For stills, start with swapping faces in a photo.