A good presentation video should keep the structure of the deck you already built — without making you record every slide by hand. VisionStory imports the pages, turns your speaker notes into a starting narration, adds an AI presenter, and keeps the script and layout editable right up until you render.
This is not a PowerPoint screen recording. Each slide becomes a video scene with its own presenter placement and narration, and you can review the whole deck as one continuous sequence before spending credits on the final render. The video above follows the complete workflow in the current interface; the guide below covers every decision in detail.
What this guide covers: importing a PowerPoint or Keynote deck, guiding the first AI Script draft, editing in the linked slide workspace, directing the presenter, shaping narration, using AI Assistant, and previewing before you generate.
Before you begin: prepare the source deck
Start from a presentation whose visual structure is already clear. VisionStory currently accepts PowerPoint and Keynote files. Imported pages become static video scenes, so source animations and transitions are not reproduced — plan the pacing around narration instead.
- Keep important text and charts inside the slide margins.
- Add speaker notes where you already know what each page should say — they become the starting script.
- Keep slides concise; narration can carry the explanation that does not fit on screen.
- Remove duplicate or unnecessary pages before uploading.
Current slide limits: Pro supports up to 20 slides, Advanced up to 50, and Ultra up to 100. Plan limits change over time — confirm the latest on the pricing page.
Step 1: Upload the deck and let VisionStory build the scenes
Open AI Presentation and drag your presentation into the upload area. When processing completes, the deck appears as a new creation: one scene per slide, with any speaker notes read in as the starting narration.
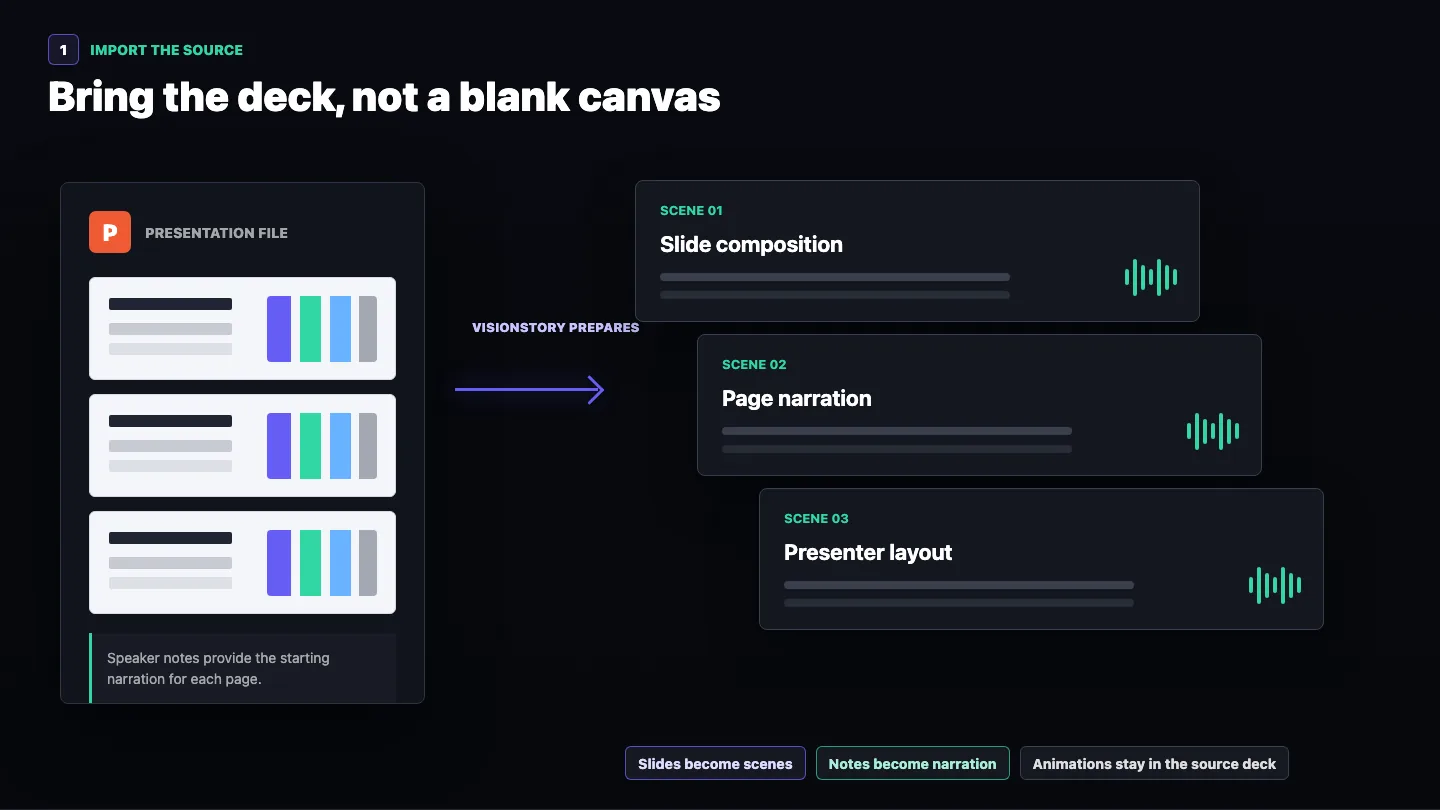
Because each imported page is the static background of a new scene, PowerPoint animations and transitions stay in the source file. The final rhythm comes from narration, presenter movement, and slide-to-slide timing instead.
Step 2: Guide the first narration draft
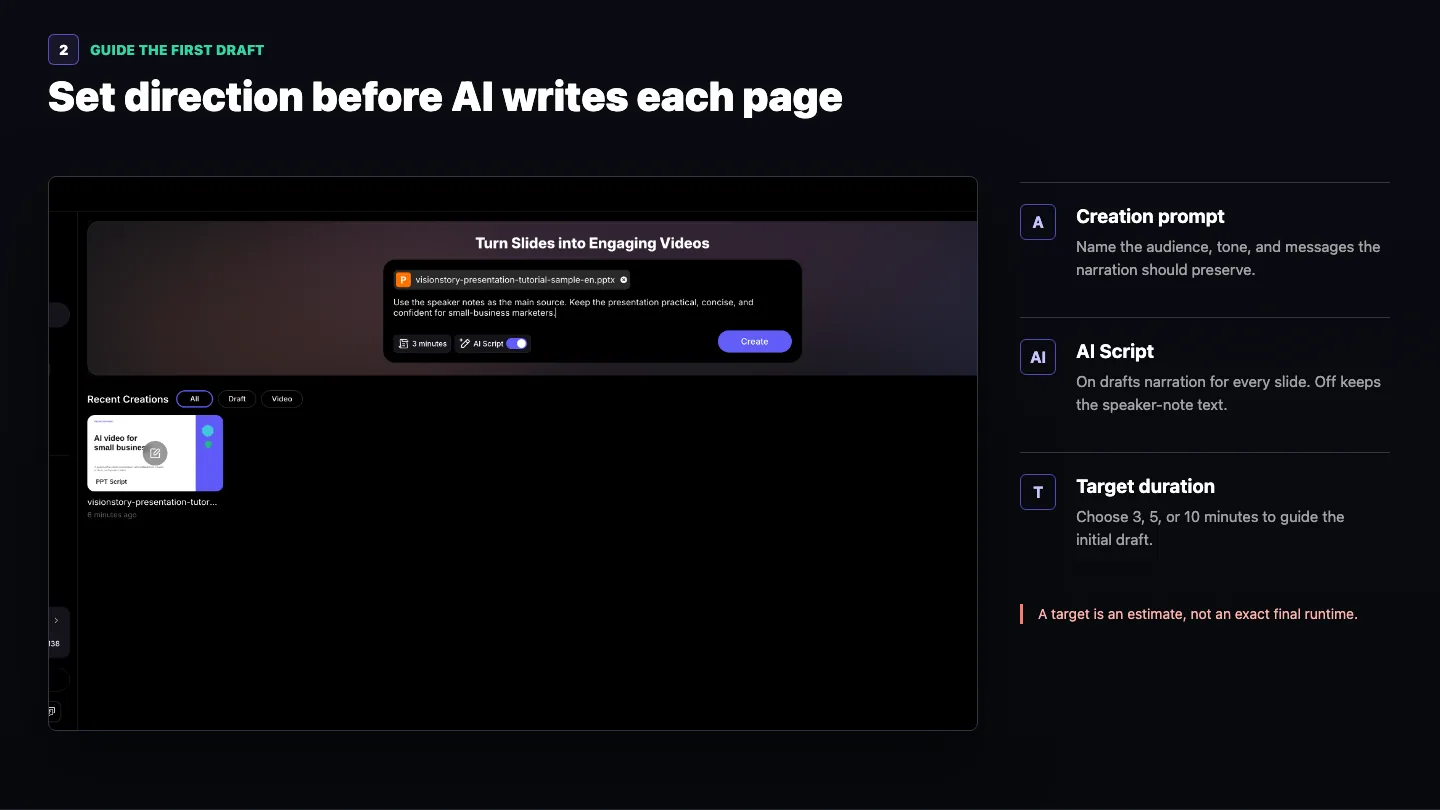
Before clicking Create, add a short instruction naming the audience, the tone, and any message the presentation must preserve. A practical one-line prompt beats a long creative brief.
- AI Script on — VisionStory drafts narration for every slide from the deck, your notes, and your instruction.
- AI Script off — your speaker-note script stays as the starting point for manual editing.
- Target duration — choose 3, 5, or 10 minutes to guide the initial draft.
Target, not timer: the duration control is an estimate. Slide count, narration length, pauses, recordings, and later edits all shape the final runtime.
Click Create when those choices are set. VisionStory analyzes the deck, prepares the narration, and suggests a presenter layout for each page.
Step 3: Work page by page in the linked workspace
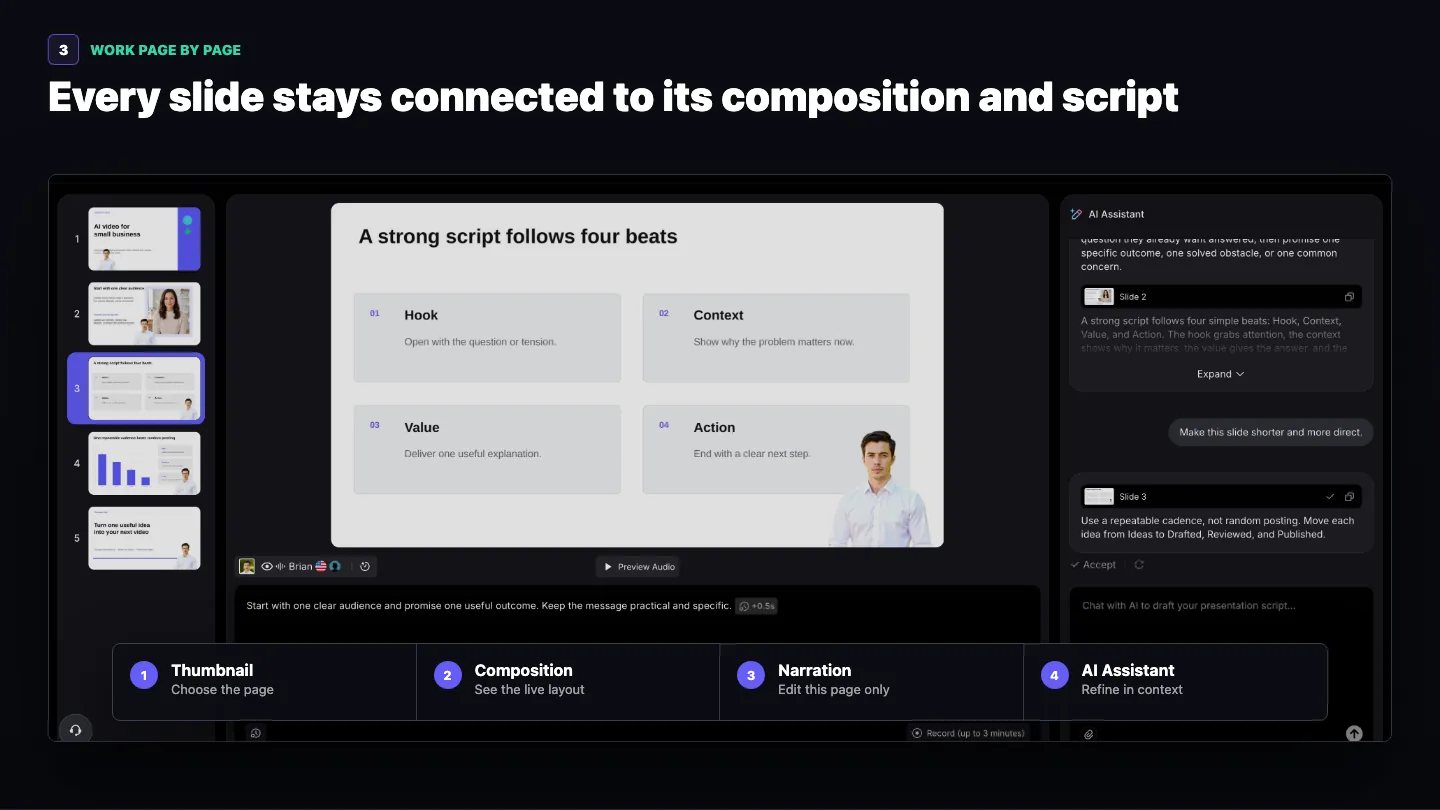
The editor keeps four parts of the active page connected. Click a slide thumbnail and the main composition, the narration box, and the AI Assistant context all switch to that page together.
- Slide thumbnails — navigate the deck and see which page is active.
- Live composition — review the imported slide and the current presenter layout.
- Page narration — edit the words, preview the audio, or record this one slide.
- AI Assistant — refine copy with the current page visible as context.
Review the deck page by page rather than assuming one change applies everywhere. That is how you catch a presenter covering a chart, a sentence that repeats the slide title, or a page that needs a slower pace.
Step 4: Refine the AI presenter on each slide
VisionStory suggests a presenter position that keeps important slide content visible. Treat it as a strong starting point, then select the presenter wherever a page needs a manual pass.
- Move and resize — fit the presenter around text, charts, and the visual hierarchy.
- Switch character — pick a different presenter when the audience or subject calls for it.
- Change the frame — use a square or circular crop, with a transparent or colored background.
- Reuse the layout — copy, paste, hide, or apply the current setup across the deck.
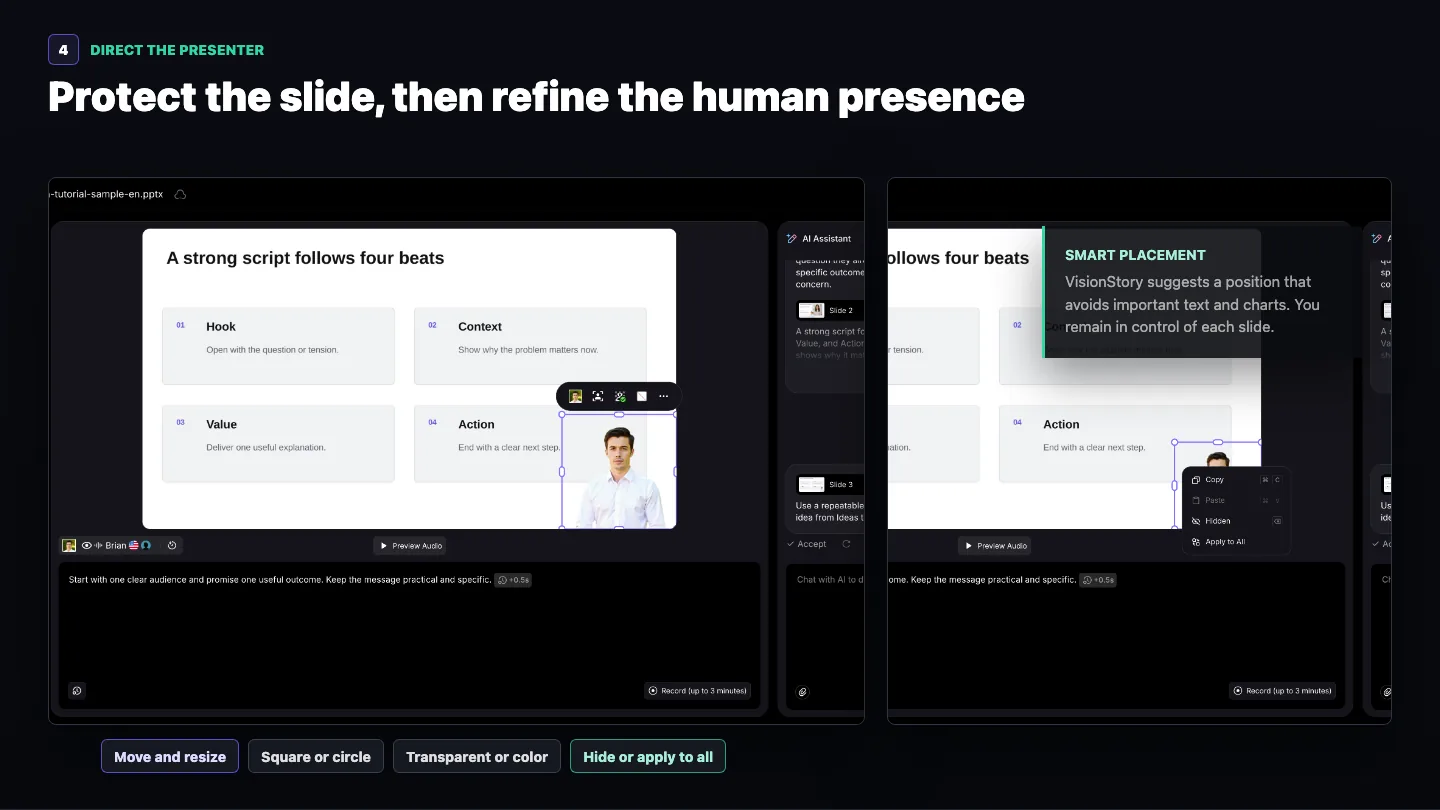
Do not apply one placement to every slide without checking the result — a position that works on a title page can cover the most important data on a chart slide.
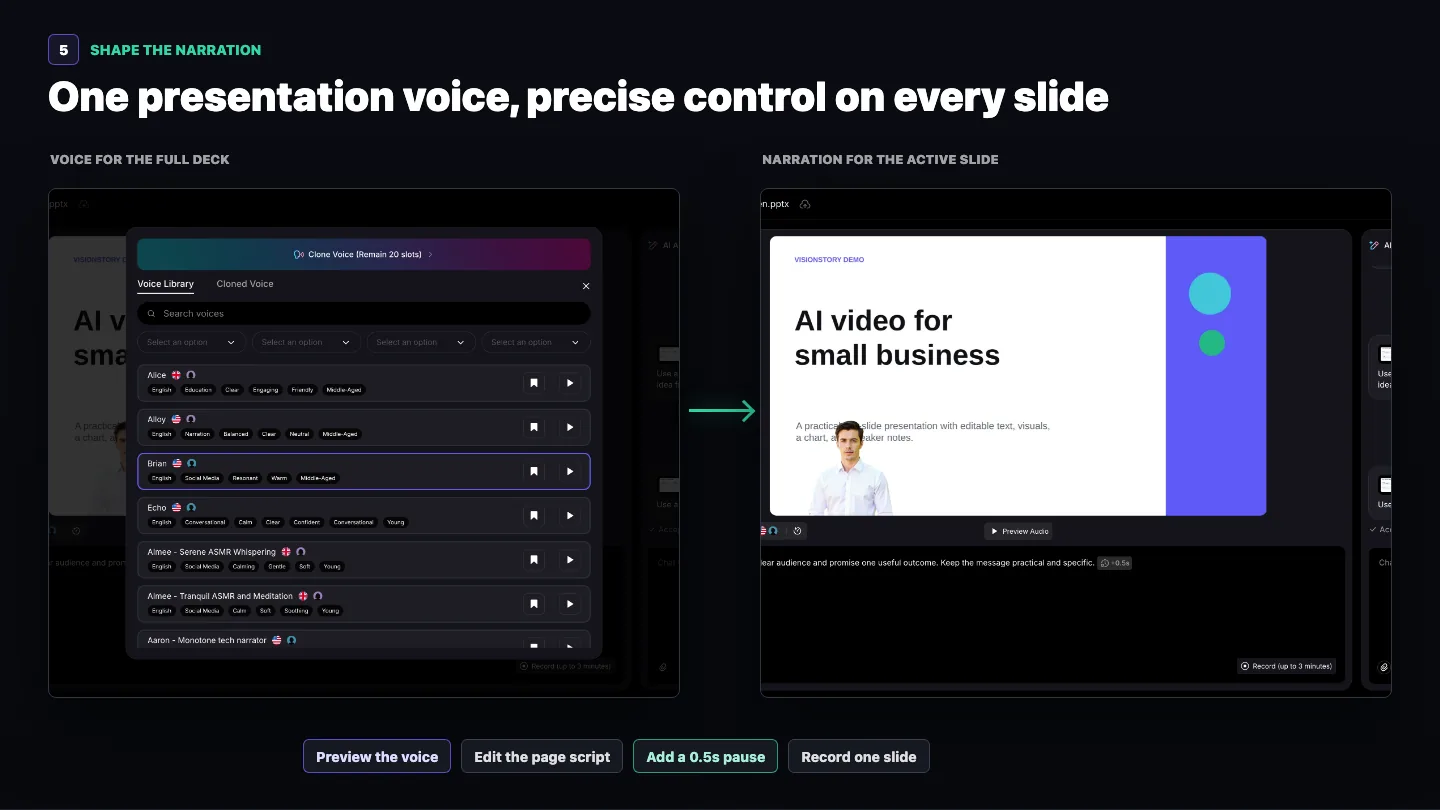
Step 5: Choose the presentation voice, then tune each page
Open the voice control and choose one voice for the full presentation. Preview candidates before applying, so the accent, pace, and vocal character fit the audience — the full selection workflow is in how to choose an AI voice.
The script itself stays page-specific. Edit the narration on the active slide, insert a 0.5-second pause where the delivery needs breathing room, and use Preview Audio to hear the result before moving on.
When text-to-speech is not the right choice for a page, open Record and capture up to three minutes of your own narration for that individual slide.
Step 6: Use AI Assistant without giving up editorial control
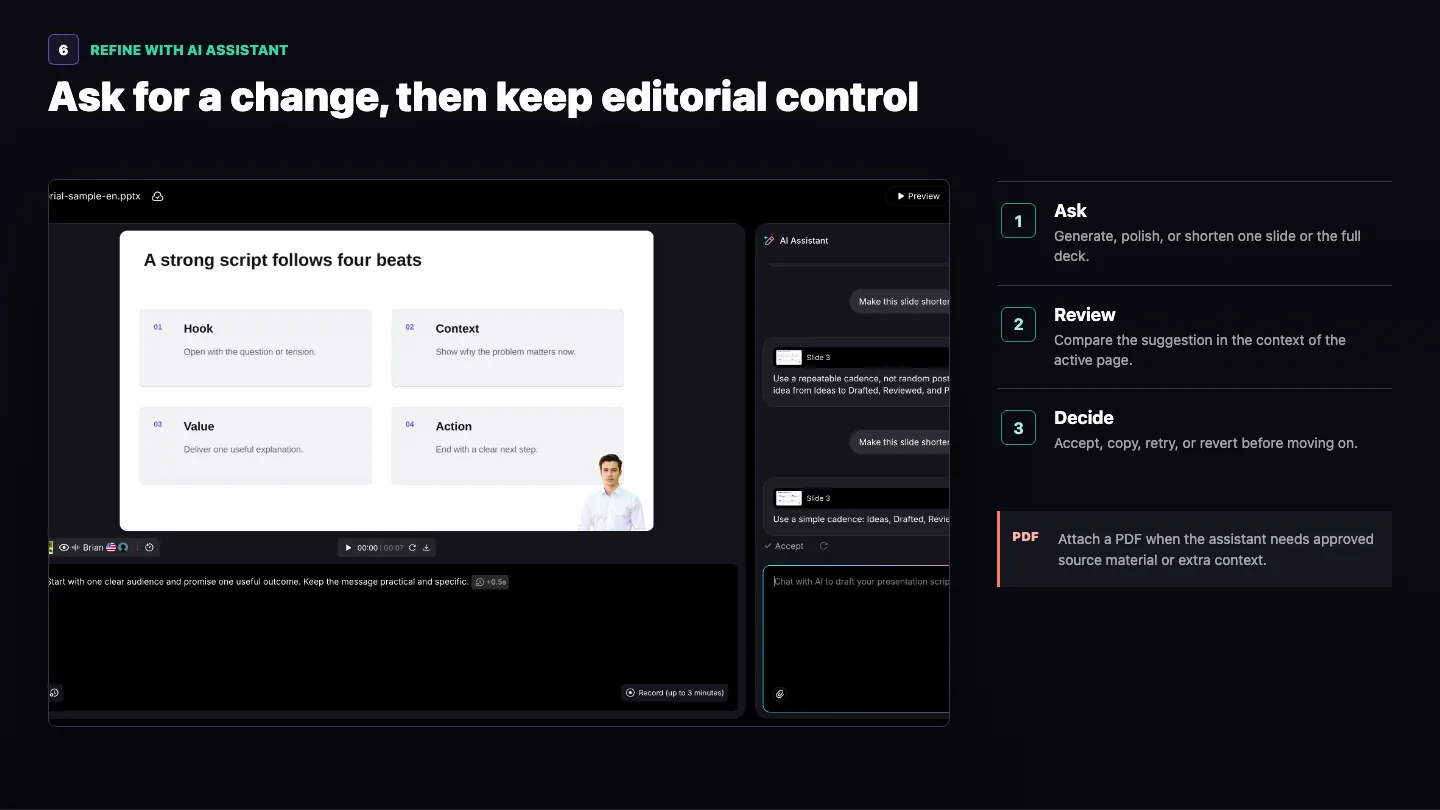
AI Assistant can generate, polish, shorten, or restructure narration while the current slide stays visible as context. Ask for a specific outcome — make this slide shorter and more direct — rather than a broad request to improve everything.
Review every suggestion before it enters the final sequence: accept it, copy it, retry, or revert to the previous version. The assistant can work on the active page or across the full deck.
Attach a PDF when the assistant needs approved reference material — a course brief, a product document, or another source that should ground the narration.
Step 7: Preview the full deck, then review generation settings
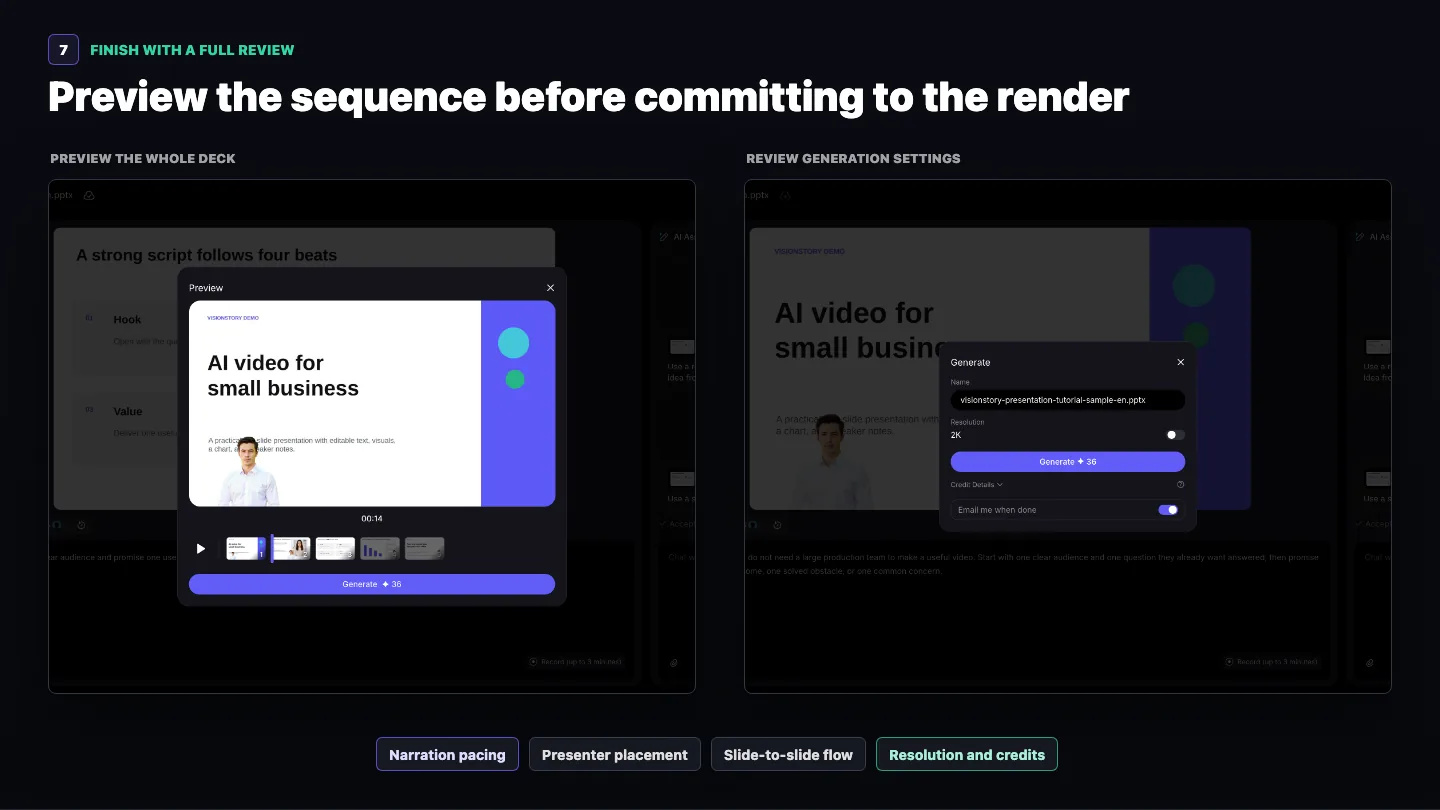
Open Preview to hear the narration as one sequence and watch the deck move from slide to slide. This is the moment to check continuity, not just individual pages:
- Does the narration pace match the amount of information on each slide?
- Does the presenter avoid headings, charts, and essential details?
- Do slide changes land at natural points in the spoken explanation?
- Are names, numbers, and technical terms pronounced correctly?
- Does the final page leave a clear closing beat?
When the sequence is ready, click Generate. Review the title, open Credit Details, choose the resolution available on your plan, and decide whether VisionStory should email you when the render completes. Presentations render at 1080p by default, and 2K is available on plans that include 2K output — see how VisionStory credits work for what a render costs.
From deck to video, without starting over
The deck you already made carries the structure; VisionStory adds the presenter, the narration, and the editing workspace to turn it into a video worth publishing. Upload the slides, guide the first draft, review every page, preview the sequence — then generate.
Ready when you are: open AI Presentation, or start from a single presenter instead with how to create an AI talking avatar.