Viral Music turns a source track and a character image into a complete music-video sequence. You choose the exact passage, decide how the performer should look, set the delivery format, and review the live estimate before generation. VisionStory then creates the visual performance and arranges its shots around the song.
This is not a frame-by-frame editor. Your strongest controls are the source passage, the source image, and the output format — choosing those inputs deliberately has far more impact than treating them as setup details. The video above runs the whole workflow on a real song excerpt and an actual generated result; the steps below cover each decision.
- Source — an audio file, or a video whose soundtrack becomes the source track.
- Clip length — a continuous passage from 15 seconds up to 10 minutes.
- Output — 9:16 or 16:9, at 720P, 1080P, or 2K.
- Plan — any active paid subscription; 720P, 1080P, and 2K are available on every paid plan.
Before you begin: prepare the track, the moment, and the performer
Start with a song you are allowed to use and a clear idea of which section should become the video. A chorus, hook, or other self-contained passage usually gives the edit a stronger shape than an arbitrary time range.
- Prepare the track — upload an audio file, or upload a video if you only need its soundtrack. Made the song in Suno? You can paste its share link instead.
- Know the passage — note the rough start and end before opening the selector.
- Prepare the character — use a clear face and a presentation that fits the vocalist, genre, and mood.
- Choose the destination — vertical short-form feed, or a landscape player.
Use permitted media: upload only music and character imagery you own or have permission to use. Generation does not replace the need to clear the underlying rights.
Step 1: Open Viral Music and add the source track
Open Viral Music from the VisionStory sidebar. Browse Explore to see what finished results look like, or start your own project by dragging a track into the upload area.
Audio files are used directly. If you upload a video, Viral Music extracts and uses its soundtrack — the source video's picture is not carried into the generated result.
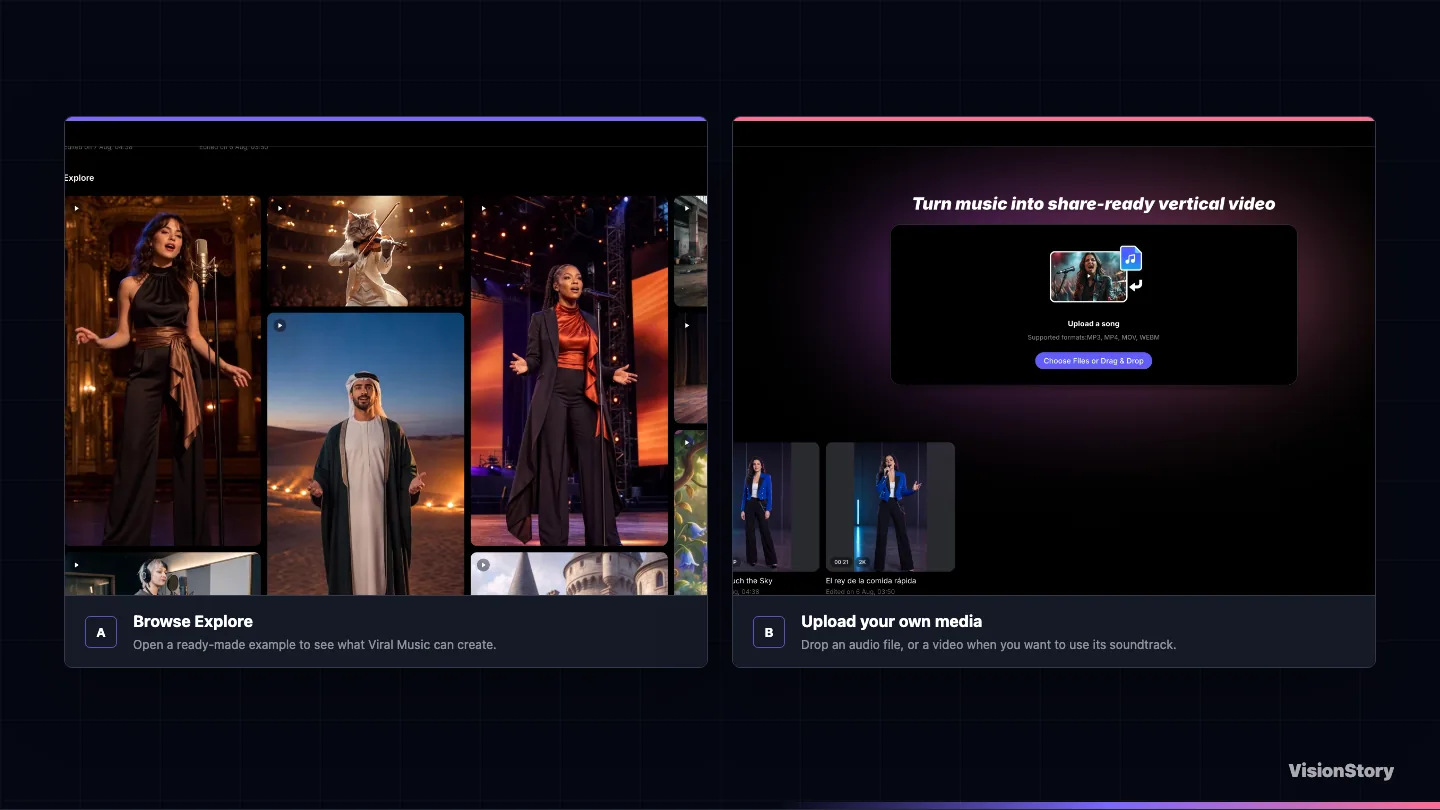
What to expect next: after the upload is ready, VisionStory opens the clip selector. Wait for the waveform before trying to set the range.
Step 2: Select the exact passage to turn into video
The selection window is continuous. Drag the left handle to set the beginning and the right handle to set the ending. To keep the same duration but use another part of the track, drag the entire selected range along the waveform.
Use the play button to hear the exact passage. Stop the preview, check the displayed duration, and click Confirm only when the selected audio begins and ends cleanly.
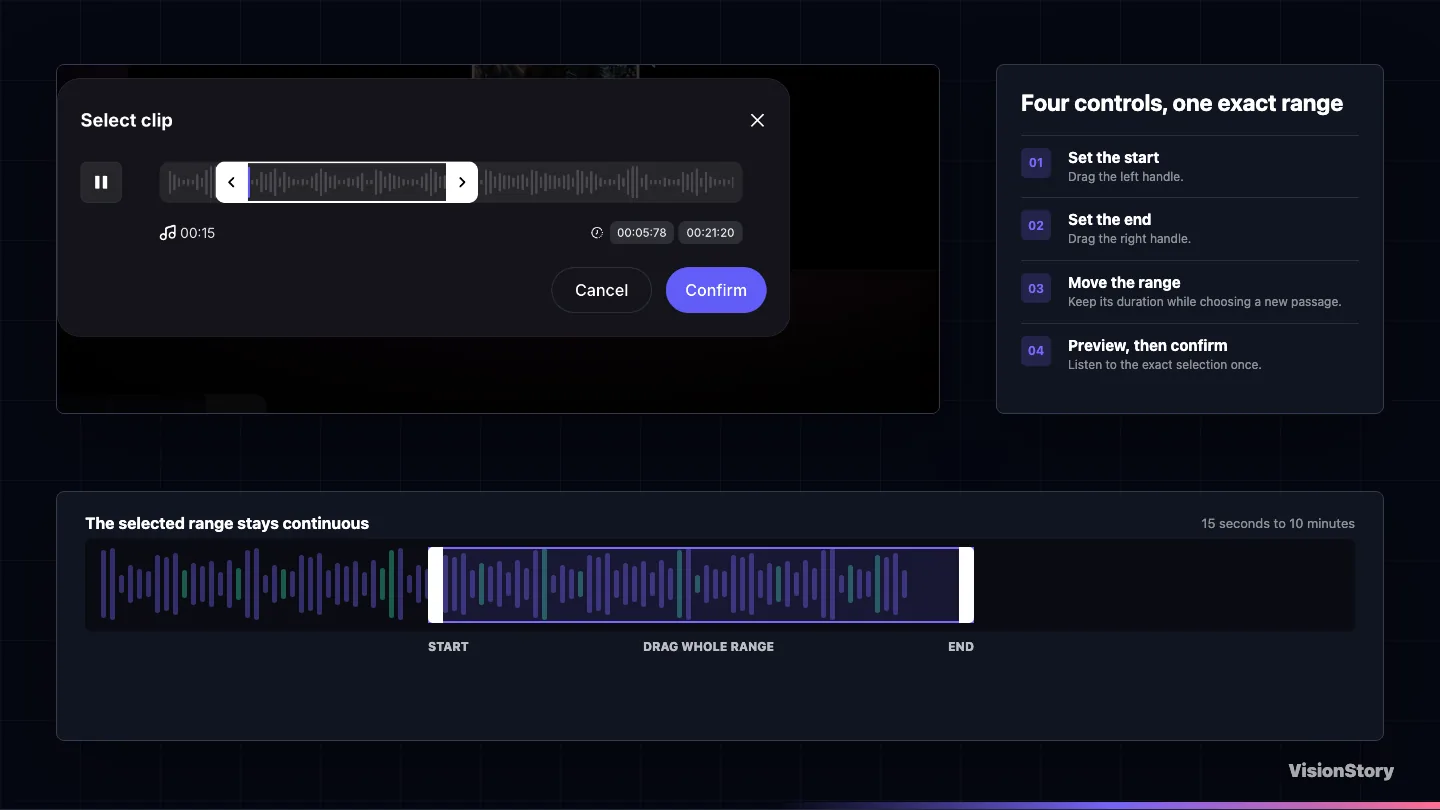
Choose musical boundaries: a clean phrase boundary is easier to turn into a satisfying sequence. Avoid starting halfway through a word or ending before a vocal or instrumental phrase resolves.
Step 3: Choose the character and set the visual direction
Open the character selector. You can upload a new image, reuse one of your own avatars, or browse the public library. The selected image is more than an identity reference: it guides the visible performer, outfit, setting, and overall look of the result.
Use a clear, unobstructed face and an intentional full or medium view. Include the wardrobe and environment you want VisionStory to interpret — a coherent source image gives the generated camera setups a stronger shared direction.
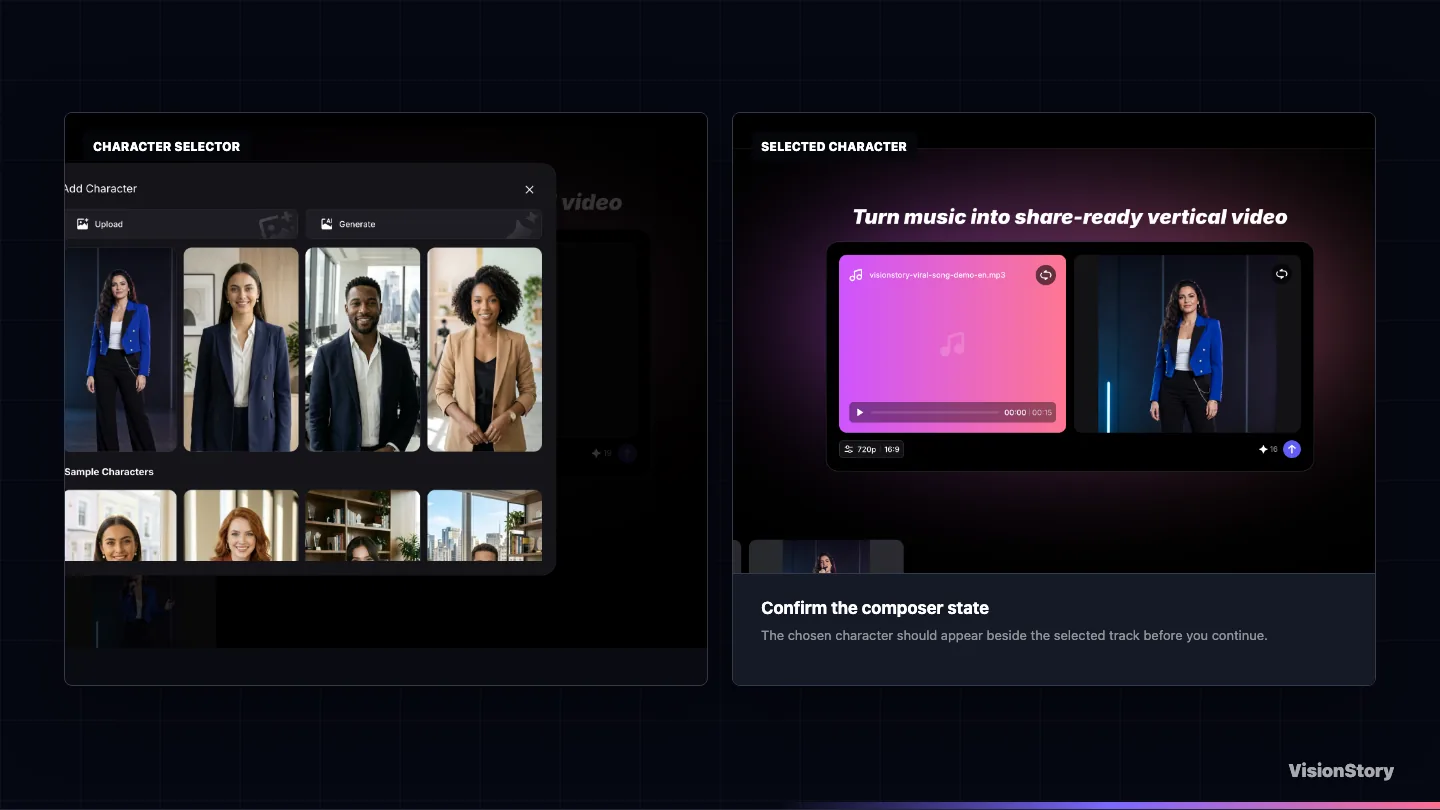
Match the performance: choose a character whose presentation fits the singer and the genre. The source image does not need to show a microphone, but it should make the intended performance believable.
Step 4: Choose the aspect ratio and resolution, then review the estimate
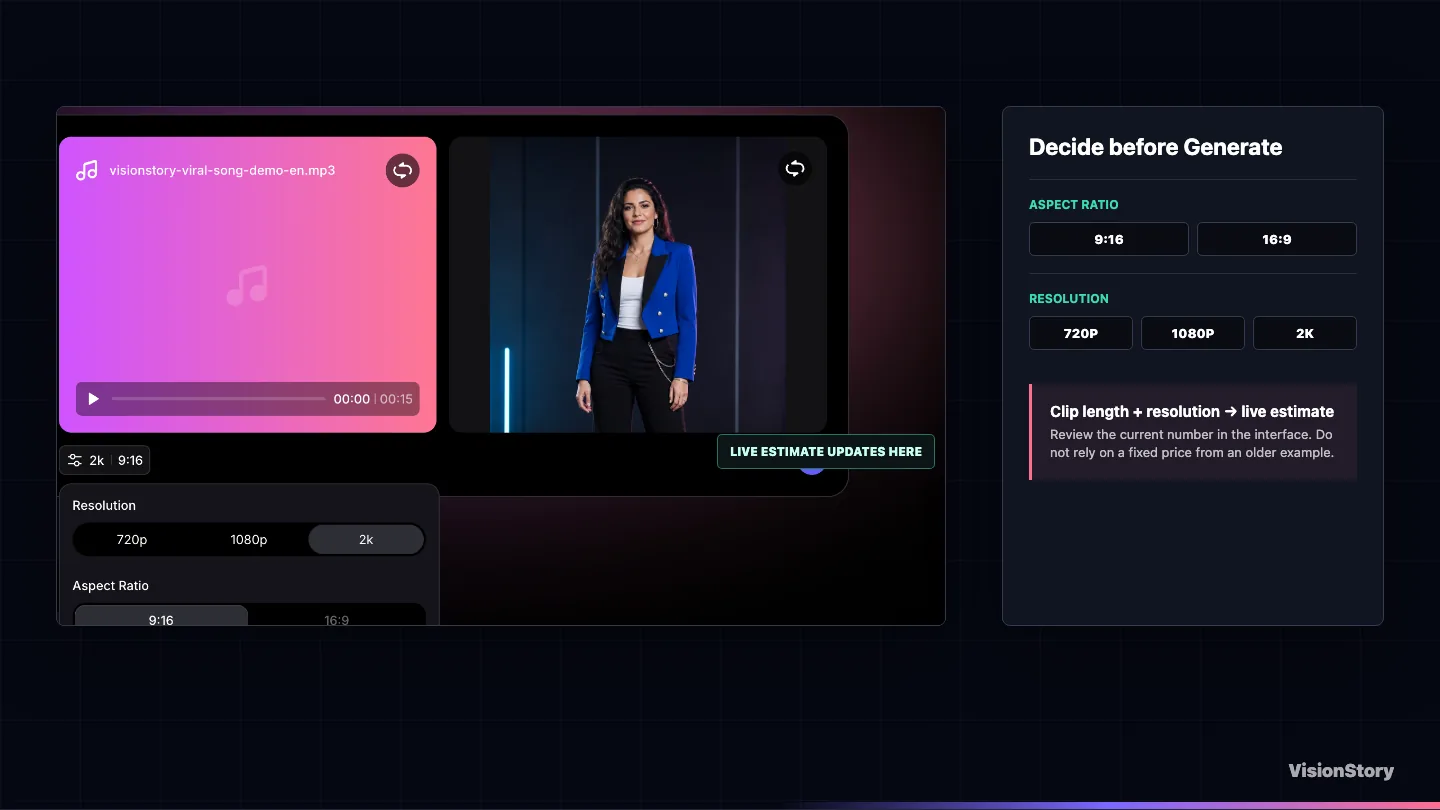
Open the output settings beneath the track and character. Choose 9:16 for vertical short-form video or 16:9 for landscape playback, then pick 720P, 1080P, or 2K for the level of detail you need.
The estimate updates with the selected clip length and resolution. Review the current number beside Generate before submitting the task.
| Choice | Use it when | Trade-off |
|---|---|---|
| 9:16 | The primary destination is a vertical feed or short-form platform. | The source character should leave enough vertical room for varied framing. |
| 16:9 | The video will appear in a landscape player, presentation, or widescreen edit. | Review how the performer and environment share the wider frame. |
| Higher resolution | The output needs more visible detail or a larger viewing size. | The live estimate changes — inspect it before generation. |
How pricing works: Viral Music is billed per second of the selected clip, rounded up to a whole second — 1 credit per second at 720P, 2 at 1080P, and 5 at 2K. A clip just over 25 seconds counts as 26 seconds, and the 4-second rate for talking-avatar videos does not apply here. The estimate beside Generate shows the exact amount; see how VisionStory credits work for the wider picture.
Step 5: Generate, open, and review the finished music video
When the track, character, format, and estimate are all correct, click Generate. Viral Music analyzes the song's tempo, energy, structure, and lyrics when they are available, then uses that information to shape the performance, create consistent camera setups, and arrange the shots around the music.
When the task completes, open it from the Videos area and play the result with the original song. Judge the complete sequence, not one still frame.
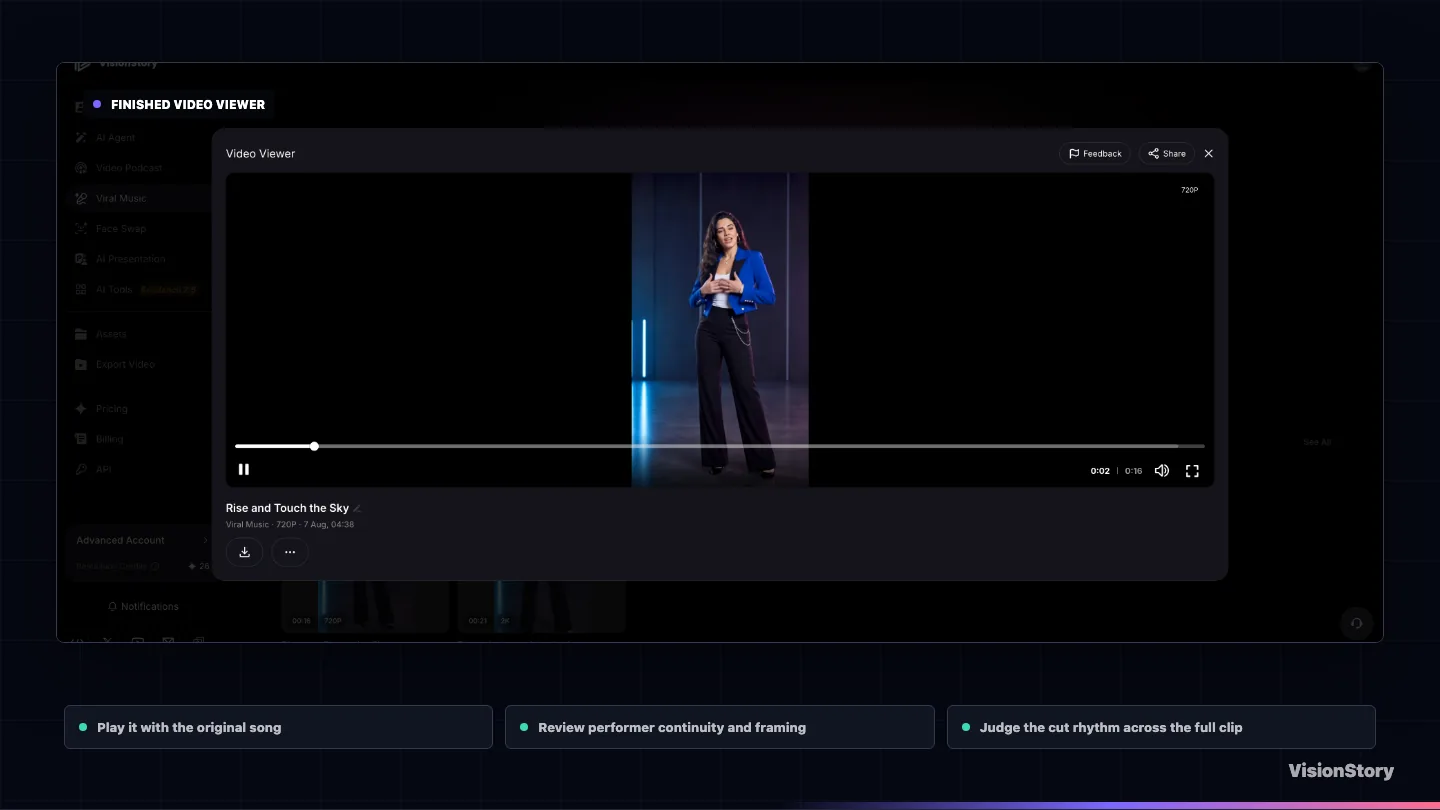
What to review: a consistent performer, useful changes in framing, a natural relationship between delivery and music, and cuts that help the selected passage move. Beat-aware editing is informed by the song — it is not a promise that every cut lands on an exact beat.
If the visual direction is wrong throughout the result, change the source image before retrying. If the beginning or ending feels weak, return to the clip selector and choose a cleaner musical passage. Those changes are usually worth more than regenerating from unchanged inputs.
A practical Viral Music checklist
- I have permission to use the track and the character image.
- The selected passage begins and ends on clean phrase boundaries.
- The source image shows a clear, unobstructed face.
- The outfit, setting, and character fit the music.
- The aspect ratio matches the destination.
- I reviewed the live estimate at the chosen resolution.
- I watched the final result with its audio from beginning to end.
- I judged performer continuity, framing, and cut rhythm together.
The best result starts before you click Generate
Viral Music handles the performance and the edit, but the creative direction begins with your inputs: a passage with a clear musical shape, one image that communicates the performer and their world, and an output format chosen for where the video will actually be watched. With those in place, one track and one character become a complete visual performance — no manual shot creation, no timeline editing.
Keep going from here: put a speaking character in front of the camera with creating an AI talking avatar, pick the right vocal identity in choosing an AI voice, or explore the AI music video generator itself.